1. Overview of Precious Metal Oxidation and Safe Home Cleaning Trends
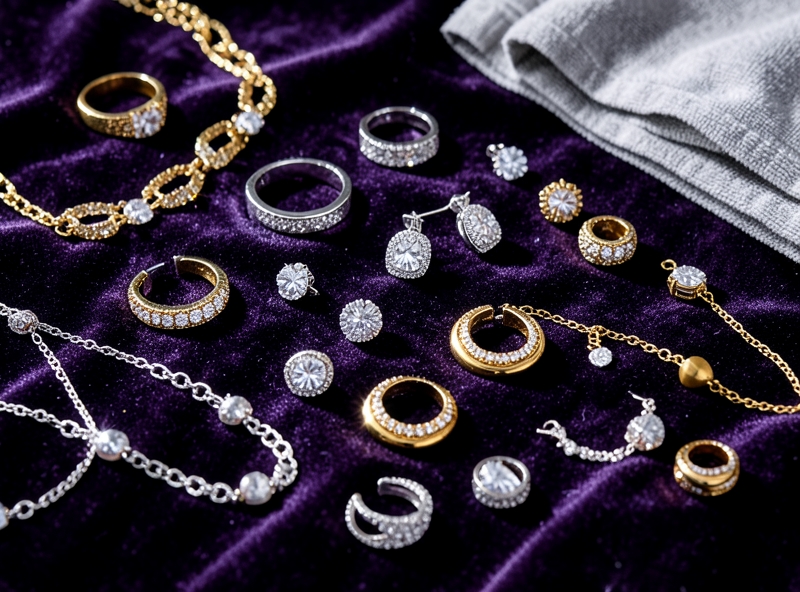
A cherished silver anniversary ring suddenly turns dull gray, a gold bracelet loses its arrogant luster, or an heirloom bronze incense burner becomes covered in splotchy green patina. What is your first instinct? Rush straight to a jeweler, or order a bottle of ultra-fast industrial cleaning solution heavily advertised online? The truth is, these quick fixes often contain strong acids, ammonia, or extreme abrasive solvents. Not only do they erode the precious metal layer after every wash, but they also release toxic fumes into your living space.
Understanding the true nature of oxidation will help you realize that you can completely reverse this process safely, affordably, and with maximum protection for your jewelry's surface using physical and green chemistry methods right in your kitchen.
| Precious Metal | Primary Tarnishing Agent | Characteristic Appearance | Natural Chemical Reaction |
|---|---|---|---|
| Silver (Silver / Sterling Silver) | Sulfur compounds in the air (H₂S), sweat containing sulfur and amino acids. | Surface turns from light gray to completely dull black. | Forms an extremely adherent thin film of silver sulfide (Ag₂S). |
| Copper (Copper / Bronze / Brass) | Oxygen, water vapor, and carbon dioxide (CO₂) in the atmosphere. | Loses its signature red/yellow luster, developing a green patina (Verdigris). | Forms protective but unsightly basic copper carbonate [CuCO₃·Cu(OH)₂]. |
| Karat Gold | Alloyed metals (copper, silver in 10K, 14K, 18K gold) reacting with oxygen and sweat. | Surface gradually darkens, losing its original brilliance. | Oxidizes base metal elements bound within the gold crystal lattice. |
Tarnishing is not a sign of permanent damage. It is simply a thin chemical layer covering the base metal surface. To strip away this layer without losing even a single microgram of silver or gold, modern consumer trends are shifting heavily toward green chemistry methods.
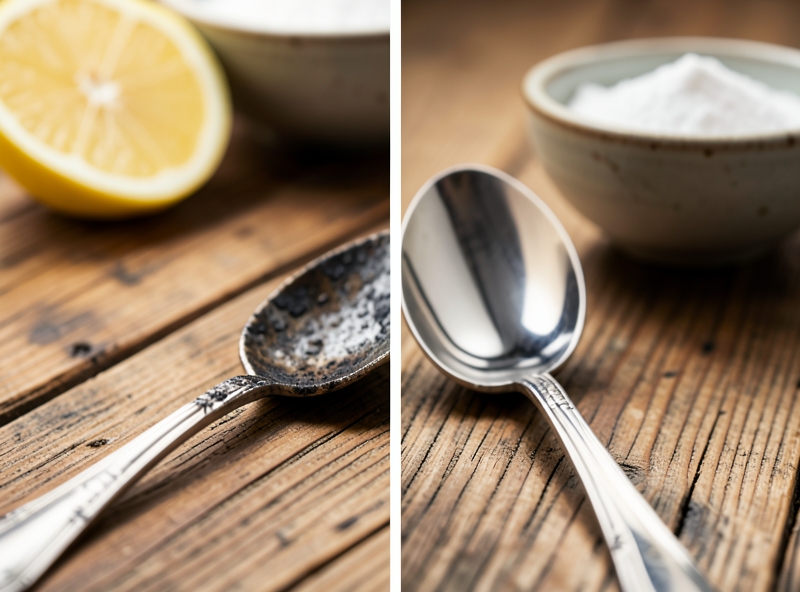
At-home green chemistry applies benign chemical transformation reactions instead of using mechanical force for harsh scrubbing that scratches items. A prime example is the ion displacement electrochemical reaction, which uses aluminum foil, salt, and hot water to directly reduce silver sulfide back to pure silver:
"In this reaction, aluminum acts as a sacrificial element. Aluminum has a stronger affinity for sulfur than silver does, automatically attracting the sulfide radical toward itself and returning to you an intact, lustrous silver surface, completely freeing you from the worry of mechanical abrasion."
By utilizing familiar ingredients such as baking soda, citric acid from lemons, table salt, or white vinegar, you establish a circular cleaning process: outstandingly effective, completely safe for skin, free of toxic emissions into the environment, and extending the lifespan of family heirlooms across generations.
2. The Secret to Cleaning Silver Jewelry Using Electrochemical Reduction
Have you ever helplessly watched your cherished silver keepsake necklace or priceless wedding ring turn dull black and smudged after just a few months of use? Many people rush to the jeweler, accepting the use of harsh abrasive chemicals, or worse, vigorously scrub them at home with toothpaste. This physical scrubbing action is a disastrous mistake. It inadvertently wears away the original silver layer, creating tiny scratches that are difficult to repair and permanently reducing the value of your jewelry.
The truth is: Silver turns black not because it is "worn out" or damaged, but due to a natural chemical reaction between silver and sulfur in the air and sweat, forming a stubborn layer of Silver Sulfide (Ag2S) on the surface. Instead of abrading it away, we can completely reverse this process using an extremely simple, safe chemical "magic" right at home: Electrochemical reduction.
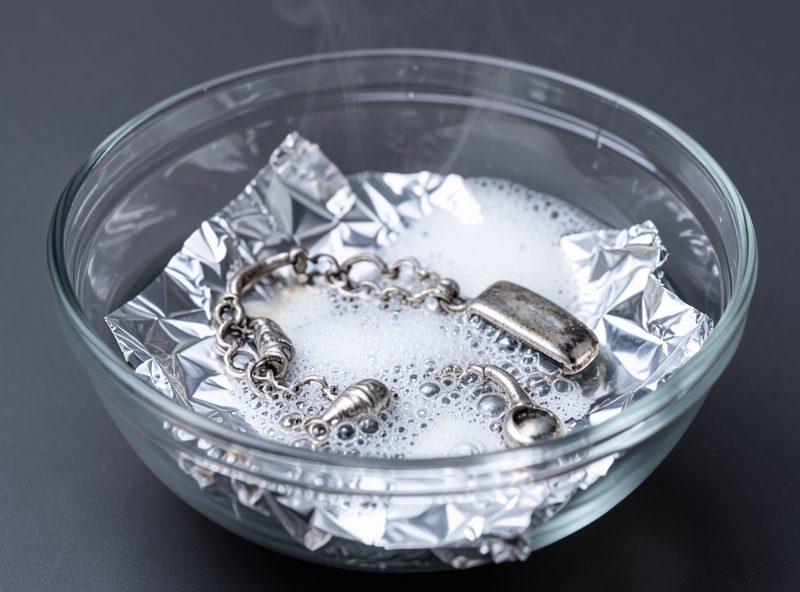
"Don't try to scrub away the tarnish. Use chemistry to voluntarily detach sulfur from silver, restoring its inherent original shine."
The mechanism of this method relies on the difference in chemical reactivity between metals. Aluminum is a metal with a much stronger reducing agent capacity than silver. When tarnished silver is placed in direct contact with aluminum in an electrolytic environment (hot water dissolving baking soda or salt), a natural electrochemical cell is established. At this point, the sulfur atoms clinging to the silver are completely "drawn" toward the aluminum to form aluminum sulfide. As a result, the black layer disappears, restoring a lustrous silver surface without losing a single milligram of silver.
| Comparison Criteria | Physical Abrasive Method (Toothpaste scrubbing, cleaners) | Electrochemical Reduction Method (Aluminum + Baking Soda) |
|---|---|---|
| Action Mechanism | Physically abrades the surface layer to expose new silver underneath. | Chemical reaction that reduces sulfur, reversing tarnish back to silver. |
| Metal Loss | Yes, thins out and scratches the jewelry surface over time. | Absolutely none, preserving 100% of the silver mass. |
| Ability to Clean Narrow Crevices | Poor, unable to reach into intricate, tiny engravings. | Absolute, electrolyte solution reaches and cleans every nook and cranny. |
| Cost and Time | Labor-intensive scrubbing, prone to damaging embedded gemstones if excessive force is applied. | Under 5 minutes with nearly zero cost. |
To perform this ultimate restoration procedure right in your kitchen, prepare these extremely easy-to-find ingredients and follow the detailed instructions below:
- Step 1: Prepare the lining. Take a ceramic or heat-resistant glass bowl. Line the interior of the bowl completely with a sheet of aluminum foil, facing the shiny side up.
- Step 2: Arrange the jewelry. Place the tarnished silver jewelry inside the bowl. Mandatory note: The jewelry must make direct contact with the aluminum foil so the electrochemical current can flow.
- Step 3: Create the electrolytic environment. Evenly sprinkle 1 to 2 tablespoons of baking soda (or table salt) over the surface of the jewelry and aluminum foil.
- Step 4: Activate the reaction. Pour boiling water (reaching temperatures around 90-100°C) until all jewelry is completely submerged. Immediately, you will notice effervescence accompanied by a slight rotten egg smell (this is hydrogen sulfide gas being released).
- Step 5: Finish up. Soak for about 3 to 5 minutes depending on the severity of the tarnish. Then, use tongs to remove the jewelry, rinse thoroughly under cold running water, and dry with a soft microfiber cloth. You will be amazed to see your old piece regain its brilliant metallic luster, looking as though it just came out of a display case.
An important expert tip: Avoid applying this method to silver jewelry set with pearls or soft gemstones glued with organic adhesives (such as opal or turquoise), as hot water and an alkaline environment can loosen the glue or dull the shine of the gemstones.
3. Methods for Removing Tarnish on Gold and Copper Using Natural Organic Acids
Have you ever felt pained looking at a sentimental gold bracelet tarnishing, or an antique copper worship set turning a dull gray? Don't rush to buy bottles of harsh, pungent industrial chemical cleaners. They not only damage your hands but can also corrode and strip away the natural luster of precious metals. The real secret lies right in your kitchen: natural organic acids combined with table salt.
"The essence of cleaning metal is not abrading the surface, but triggering a selective chemical reaction: dissolving the tarnished oxide layer while preserving the original metal structure intact."
Why is this method surprisingly effective? Let's look at it from a chemical perspective. Copper tarnishes due to oxidation forming a layer of copper oxide (CuO). Meanwhile, gold, though less prone to oxidation, easily accumulates grime from sebum, sweat, and sulfur compounds in the air. Citric acid (found in lemons) or acetic acid (found in vinegar) are weak acids. When combined with sodium chloride (table salt), they create a strong electrolyte environment that quickly breaks down stubborn oxide bonds, turning them into soluble salts that are easily rinsed away with water, absolutely causing no erosion or damage to the underlying gold or copper structure.
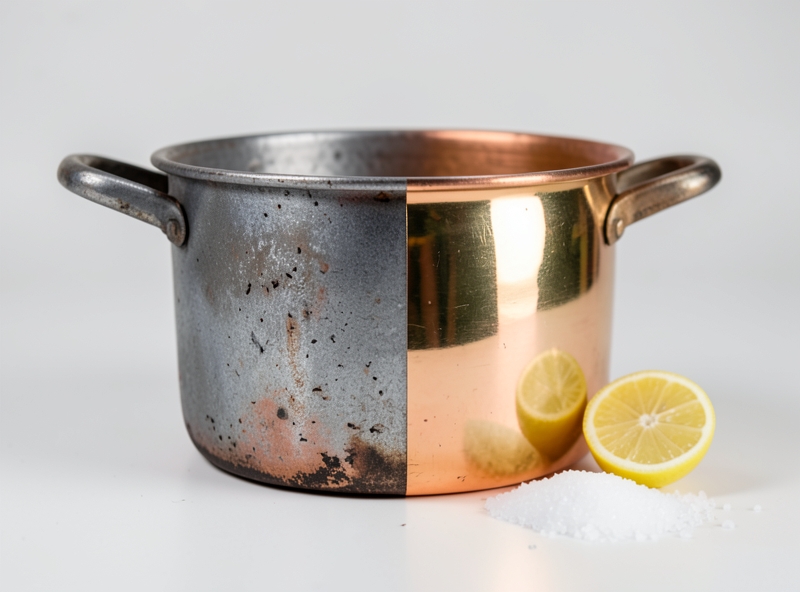
To achieve optimal results without scratching the surface of your items, follow the precise process below:
- Step 1: Create the reaction mixture. Squeeze the juice of a fresh lemon (or use 2 tablespoons of vinegar) and dissolve it with 1 teaspoon of fine salt. The salt must be partially dissolved to prevent sharp crystals from scratching the gold surface.
- Step 2: Surface application. Use a soft cotton ball or microfiber cloth soaked in the solution to gently apply it evenly over the tarnished gold or copper surface. For copper pieces with intricate carved details, use a super-soft toothbrush to work the solution into the crevices.
- Step 3: Wait for the natural reaction. Let it sit for about 2 to 3 minutes. You will see the dull black film start to lift off and fade away.
- Step 4: Rinse and dry. Rinse thoroughly with warm water to completely remove any excess acid. Finally, wipe dry with a soft cloth. Complete drying is mandatory to prevent moisture from reactivating the copper oxidation process.
| Metal | Recommended Formula | Mechanism of Action | Safety Precautions |
|---|---|---|---|
| Gold | Fresh lemon + Warm water (no salt needed if only lightly soiled) | Citric acid dissolves organic buildup, sweat, and accumulated dirt. | Do not use a hard brush; avoid scratching soft 24k gold surfaces. |
| Copper/Bronze | Vinegar (or lemon) + Fine salt | Acid combined with Cl- ions breaks down persistent copper oxide films. | Must be dried thoroughly after rinsing to avoid water spots. |
By applying this natural reaction, you not only save money but also protect the original value of your precious items. Try it today to restore the proud shine to your family heirlooms.
4. Important notes to protect jewelry and items after cleaning
Clean does not mean safe. Many people have paid a heavy price with permanent damage to heirloom jewelry just because of a small mistake right after cleaning. Restoring the shine is only half the battle; protecting their sensitive surfaces from environmental factors is the key to determining the lifespan of your items.
"A microscopic scratch from improper wiping today will be the beginning of splotchy rust tomorrow. Fine jewelry requires understanding, not mechanical force."
The "non-negotiable" rule for sensitive gemstones
Not every sparkling material has the same physical structure. Applying high temperatures or acidic cleaners (such as lemon or vinegar) to certain specific gemstones is a sentence of "death" for their beauty:
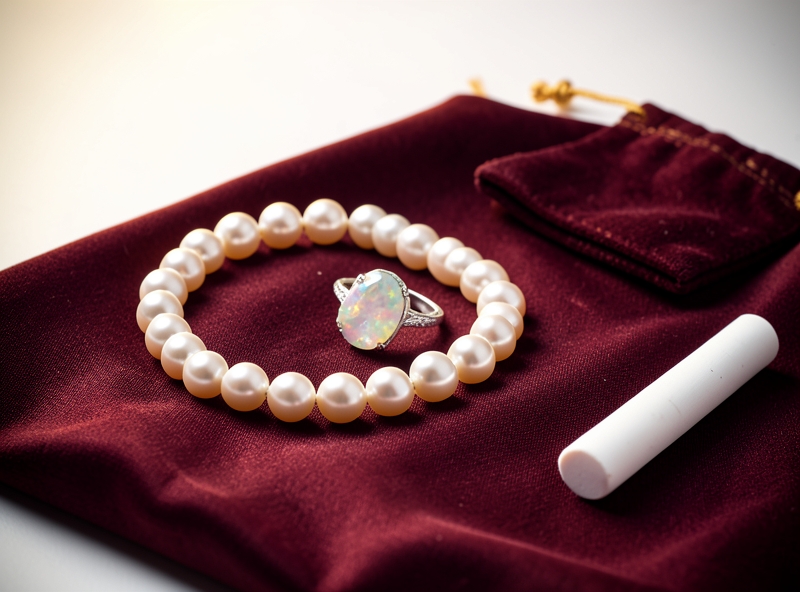
- Pearls and Coral: These are organic in nature, primarily composed of calcium carbonate. Acid, even in extremely dilute concentrations in vinegar or lemon, will immediately corrode the nacre layer, causing pearls to tarnish and permanently lose their natural luster.
- Opal and Turquoise: Contain a high natural water content within their crystal structure. When exposed to high heat from hair dryers or hot water, sudden temperature changes will cause internal fracturing (crazing), ruining their magical play of color.
- Safe solution: Only use pure warm water and mild neutral soap to clean this group of sensitive stones. Absolutely do not use ultrasonic waves or high-pressure steam.
Professional drying process: Preventing micro-scratches
After washing, conveniently grabbing a paper towel or bath towel to dry items is a common mistake. Coarse wood fibers in paper towels and rough fibers in regular cotton towels act as microscopic abrasives, leaving thousands of fine scratches on shiny gold and silver surfaces.
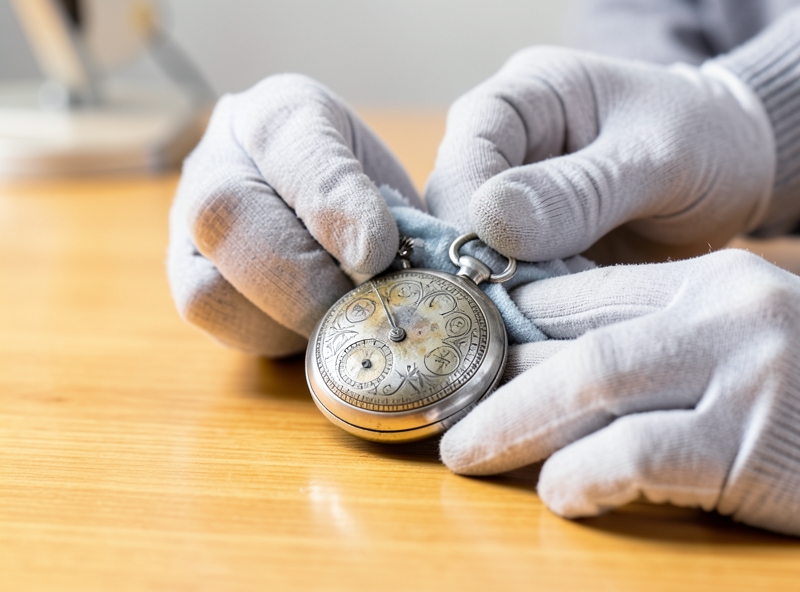
Switch to using high-quality soft microfiber cloths—the type specifically designed for cleaning camera lenses or eyeglasses. The technique is extremely simple yet requires meticulousness: gently pat dry instead of rubbing hard. For intricate carved details, use a hand air blower to push water out instead of trying to poke sharp objects into crevices.
Ultimate anti-reoxidation strategies
Silver and copper are prone to tarnishing again after cleaning due to reactions with sulfur and moisture in the air. To freeze this oxidation process, immediately apply the 3 smart storage tips below:
| Storage tool | Mechanism of action | Best way to apply |
|---|---|---|
| Airtight zip bag | Minimizes contact between metal surfaces and oxygen or tarnishing gases in the air. | Squeeze out all air before zipping closed. Each piece of jewelry should be stored in a separate bag to prevent scratching. |
| Desiccant packets (Silica Gel) | Thoroughly absorbs residual moisture in the container, preventing a rust-forming environment. | Place 2–3 small desiccant packets in the corner of your jewelry box or metal storage cabinet. Replace every 6 months. |
| Blackboard chalk | Absorbs moisture and airborne sulfur compounds extremely effectively thanks to its porous structure. | Drop a piece of dustless white chalk into your silver drawer or brass/copper flatware box. |
By strictly adhering to the drying process and proactively isolating moisture, your family's precious items will always maintain their radiant, brand-new beauty, saving you maximum time and effort for future cleanings.
5. Frequently Asked Questions (FAQ) About Cleaning Metal at Home
Restoring tarnished metal items yourself always comes with a fine line: one wrong decision can turn a family heirloom into scratched junk. Below are direct answers from metal restoration experts to help you completely eliminate unfortunate risks when cleaning at home.
Should you use toothpaste to clean silver?
The short answer is: Do not overuse it. Although life-hack videos online constantly praise this method, toothpaste actually contains micro-abrasives (such as silica or calcium carbonate). For sterling silver (925 silver) or silver-plated items, these abrasive particles will create millions of microscopic scratches on the surface. As a result, the protective layer is destroyed, making the item get dirty five times faster and lose its original mirror shine. Instead of toothpaste, use an electrochemical method with aluminum foil, salt, and baking soda to protect the silver surface completely.
How often should you clean your jewelry?
There is no one-size-fits-all rule for every type of metal. Cleaning frequency depends entirely on the item's level of exposure to sweat, chemicals, and the environment:
| Item / Jewelry Type | Light Cleaning Frequency | Deep Maintenance Frequency |
|---|---|---|
| Daily wear rings, earrings (gold, platinum) | Once a week (With warm water and mild soap) | Every 6 months |
| Silver jewelry (prone to tarnish due to sulfur in the air) | Right after each use (Wipe dry with a specialized cloth) | Every 1 - 2 months (When it starts to turn slightly yellow) |
| Decorative brass/bronze items, door handles, incense burners | Weekly (Dust off with a soft dry cloth) | Every 3 - 4 months (To preserve the natural patina layer) |
How to distinguish between ordinary dirt and deep oxidation?
Correctly identifying the nature of the stain helps you choose the right cleaning solution, saving time and preventing material damage:
- Ordinary dirt (Dirt/Grime): Usually caused by accumulated dust, grease from sweat, or cosmetics. This stain has a raised texture on the surface, feels slightly sticky to the touch, and appears dull gray or patchy black. You can easily clean it completely using diluted dish soap and a super-soft bristle brush.
- Deep oxidation (Tarnish/Corrosion): This is the result of a chemical reaction between metal and oxygen, moisture, or sulfur. Oxidation is flush with the metal surface (cannot be scraped off with a fingernail) and causes characteristic discoloration: silver turns black/gray, copper/brass turns green (verdigris) or brick red. This tarnish is completely inert to regular soap and must be treated using chemical reduction reactions or appropriate specialized acidic/alkaline solutions.
"Do not try to scrub hard when you see metal discoloring. It is a chemical reaction, not dirt. Harsh mechanical scrubbing will only wear down the metal rather than reverse the oxidation process."