1. The Importance of Early Recognition of 'S.O.S' Signals from Houseplants
Discard the mindset that houseplants are just static decorations! From a true "geek's" perspective, every plant in your home is actually a highly sophisticated biological processor with millions of cellular sensors operating 24/7. Houseplants aren't simply "alive" or "dead"; they are real-time feedback systems extremely sensitive to environmental variables such as light intensity (lux), relative humidity (RH), and ion concentration in the substrate.
"Early recognition of clinical symptoms in plants is not just a mere gardening skill; it is a process of 'system log analysis' to detect biological hardware errors before they lead to a Kernel Panic – or the total death of the plant."
The sensitivity of houseplants stems from the fact that they lack a movement mechanism to escape stressors. Instead, they exhibit phenotypic plasticity. When environmental parameters exceed the tolerance range, the plant emits chemical and physical signals. If you miss the "Early Warning" stage, you are pushing the system into an irreversible cycle of entropy decay. Correct diagnosis at the pre-symptomatic stage is the critical "hotfix" to re-optimize turgor pressure and maintain the electron transport chain in photosynthesis.

Why is a correct diagnosis a vital step? Look at the recovery performance comparison table below to see the massive difference between early and late intervention:
| Detection Stage | System Status | Recovery Rate | Resource Cost |
|---|---|---|---|
| Early Stage (L1) | Slight loss of turgor pressure, microscopic pigment changes (mild Chlorosis). | 95% - 100% | Low (Adjusting water/light). |
| Middle Stage (L2) | Leaf margin necrosis, mass leaf drop, growth stagnation. | 40% - 60% | Medium (Repotting, using specialized treatments). |
| Late Stage (L3) | Severe root rot, failure of the vascular system (Xylem/Phloem). | < 10% | Very High (Pruning surgery, high risk of mortality). |
Understanding signaling mechanisms helps us avoid being misled by outward appearances. For example, a drooping leaf could be due to under-watering, but it could also be due to over-watering leading to root suffocation—two opposite causes resulting in the same "interface" error. Without a technical analytical mindset for root cause analysis, mistaken salvage actions will only accelerate the collapse of the mini-ecosystem you have painstakingly built.
- Time Optimization: Early detection helps shorten the recovery cycle from several months to just a few days.
- Energy Conservation: The plant does not have to expend excessive ATP (cellular energy) to repair dead tissues.
- Prevention of Infection: In cases where the agent is fungus or bacteria, early identification is the only way to "quarantine" the infected area, protecting other "nodes" (pots) in your home garden network.
2. Identifying and Managing Water Excess Leading to Root Rot
Welcome, "Plant-Geeks," to the most dramatic segment of operating a home biological system! Imagine the plant's root system as a massive data center that requires oxygen for cooling and metabolic operations. When you overwater, you are directly "DDoS-ing" this entire system with liquid, eliminating air pockets (macropores) and causing cellular respiratory stagnation.
To accurately diagnose this "system error" before it leads to a "Kernel Panic" (total plant death), we need to conduct a detailed observation of the output parameters:
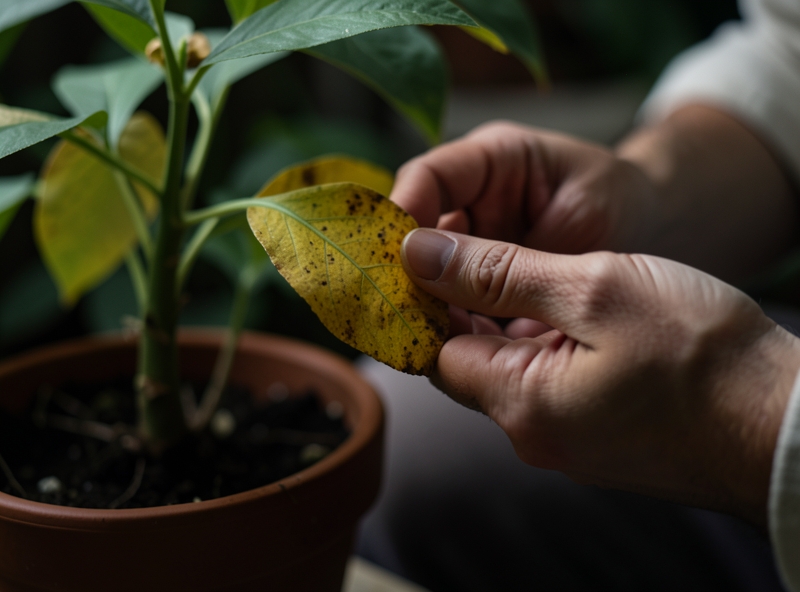
- Soft-body Chlorosis (Yellowing): Unlike yellowing caused by underwatering (dry, brittle leaves), waterlogged leaves will turn pale yellow, feel mushy to the touch, and lack vitality because the vacuoles are over-turgid but lack structural bonding.
- "Anaerobic" Odor: When oxygen disappears, anaerobic bacteria take control of the substrate. If you smell rotten eggs or a sharp sour scent from the soil, that is H2S gas—a byproduct of a decomposing ecosystem.
- Appearance of "Bio-invaders": White mold or slimy moss on the pot surface are indicators that moisture is being maintained at saturation levels (100% humidity) for too long.
| Comparison Parameters | Under-watering Status | Over-watering Status |
|---|---|---|
| Leaf Structure | Dry, brittle, curling at the edges. | Mushy, drooping but still succulent. |
| Substrate (Soil) | Shrunken, pulling away from the pot walls. | Sticky, with a slimy film or fungus. |
| Root System | Dry white or light brown, firm. | Black, slimy, easily broken, and foul-smelling. |
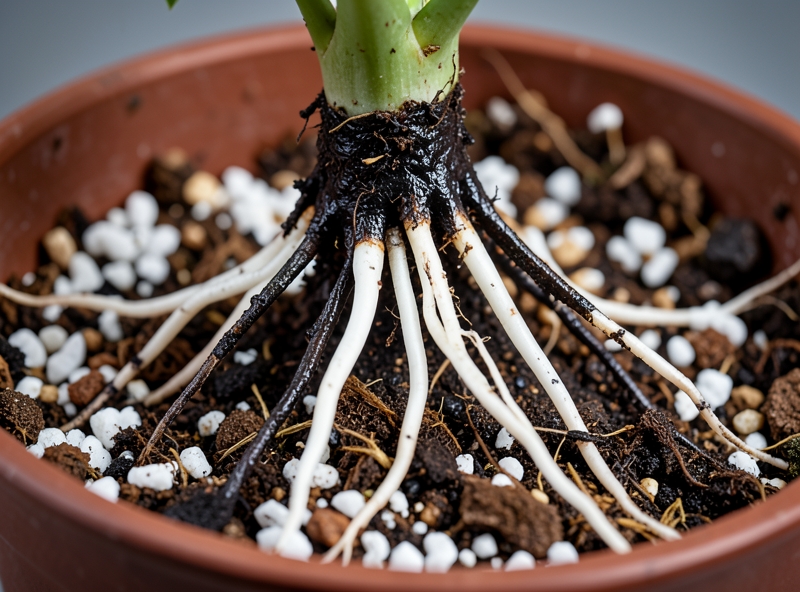
Once biological sensors have confirmed Root Rot, we must immediately execute a "Hard Reset" protocol to salvage the plant's genetic structure:
- Hardware Check (Drainage System): Inspect the drainage holes at the bottom of the pot closely. Are they clogged by old roots or compacted soil? A faulty "output" system is the leading cause of water data overflow.
- Invasive Surgery (Root Pruning): Gently lift the plant out of its pot. Use shears sterilized with 70-degree alcohol (to prevent bacterial cross-contamination) and cut away all black, mushy root sections. Retain the white or light yellow root parts that are still capable of transporting nutrients.
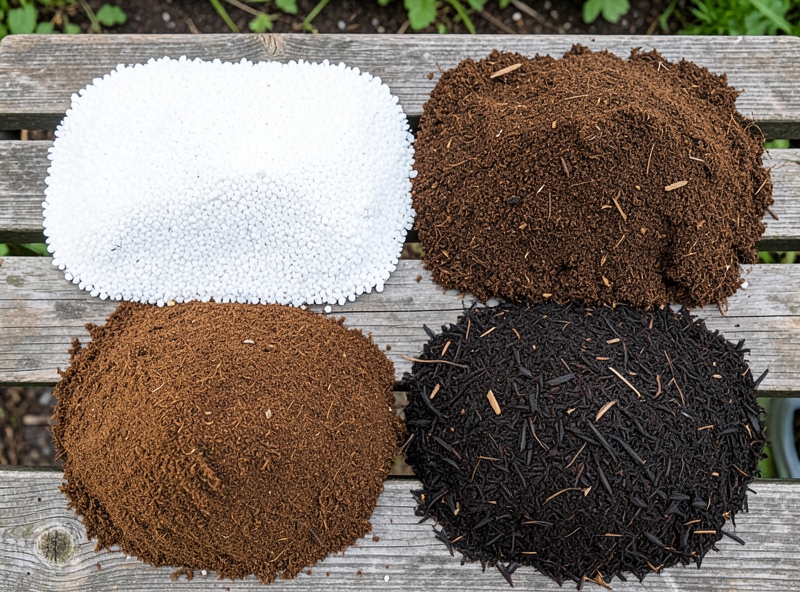
- Changing the "Operating System" (New Substrate): Remove the entire old soil layer that has been infected with anaerobic bacteria. Replace it with a high-porosity substrate mix. The optimal formula for Geeks is usually: 40% Perlite (to increase air space) + 30% pine bark/coconut husk chunks + 30% potting soil.
"In the plant world, oxygen at the root zone is as vital as the electric current in an integrated circuit. Without oxygen, all biochemical reactions hit a dead end."
After completing the recovery protocol, place the plant in a spot with strong indirect light and absolutely stop watering until the new substrate is about 50% dry. This is the phase for the root system to perform its self-repair mechanism and re-establish new root hairs. Don't forget, "Less is More" – in high-tech gardening, controlling excess is always harder than compensating for a deficiency!
3. Signs of Light Deficiency and a Safe Relocation Protocol
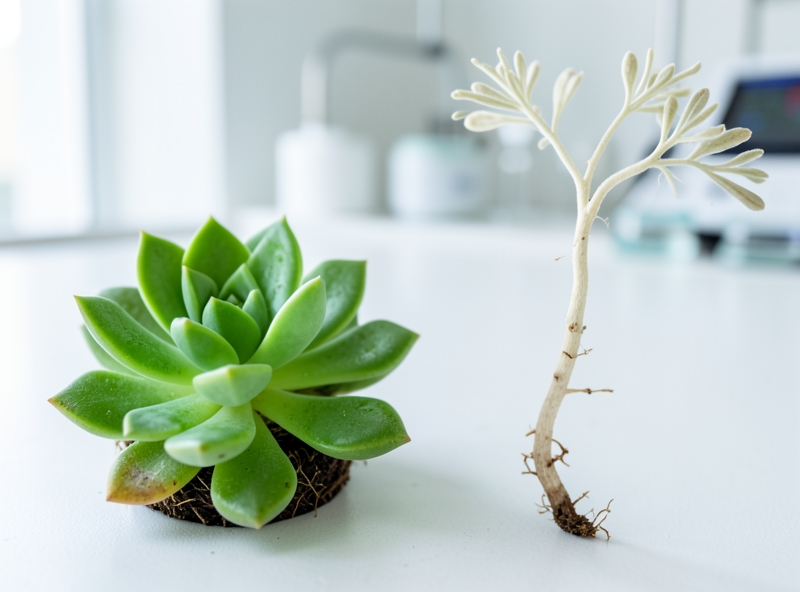
When your vibrant "biological machines" begin to exhibit instability, it is not merely wilting; it is an energy crisis at the cellular level. As operators of these micro-ecosystems, we must dissect the "SOS" signals emitted by plants when photon intensity is insufficient to trigger the electron transport chain during the light-dependent reactions of photosynthesis.
The first and most alarming sign is Etiolation (stretching of the stem). This is an incredibly sophisticated survival mechanism: when Auxin (growth hormone) concentrations concentrate on the shaded side, stem cells are stimulated to stretch to their maximum limit in search of a light source. As a result, you will see spindly, weak stems where the cellulose structure has thinned, causing the plant to lose its turgor pressure. This is often accompanied by Chlorosis – where chlorophyll molecules are not synthesized sufficiently, causing new leaves to appear pale green or saffron yellow, losing the characteristic deep green of healthy chloroplasts.
If you observe lower, older leaves being consistently "sacrificed" (leaf drop), this is the plant's resource reallocation strategy. It is actively shedding energy-consuming parts to focus on nourishing the apical meristem (growth tip). To handle this situation without causing "heat shock" or "oxidative stress," we need a precise relocation protocol:
- Phase 1: Filtered Light: Move the plant to a position near an East-facing window or use sheer curtains. The goal is to gradually increase the PAR (Photosynthetically Active Radiation) index without burning the fragile leaf tissues.
- Phase 2: Technological Intervention (Grow Lights): If natural conditions are insufficient, use Full Spectrum LED lights. These provide the exact blue wavelengths (450nm) for leaf development and red wavelengths (660nm) for stem strength, optimizing artificial photosynthetic efficiency.
- Phase 3: Photoperiod Response Monitoring: Observe the new leaves. If they grow thick, dark in color, and the internodes shorten, it means the light intensity has reached the ideal saturation point.
"Never move a 'light-starved' plant into direct, intense sunlight immediately. The protective enzymes in the leaves have been deactivated; sudden exposure to high-intensity UV rays will cause leaf scorch, permanently destroying epidermal cells."
| Symptom (Input) | Technical Failure Mechanism | Remedy (Output) |
|---|---|---|
| Long, spindly stems | Etiolation due to excessive Auxin accumulation | Increase light intensity, prune to stimulate lateral buds |
| Small, pale leaves | Chlorophyll and ATP energy deficiency | Supplement with Blue/Red spectrum LED lights |
| Lower leaves dropping | Autophagy to maintain survival | Move the plant to a location with filtered light for 4-6 hours/day |
Adjusting the position is a delicate calibration process. Remember that abrupt environmental changes are always an enemy to plants. A cautious relocation protocol will help the plant restructure its metabolic system, transforming weak green sprouts back into high-capacity "oxygen factories."
4. Timely First Aid for Heat Stress or Sunburn in Plants
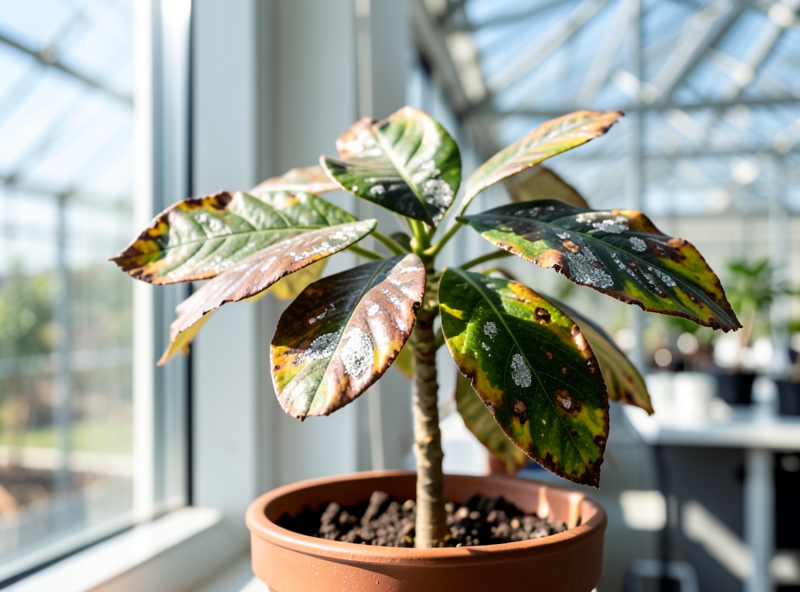
Welcome back, "Plant-Geeks," to our home biology Lab! Today, we are conducting a "Code Red" emergency for our green warriors who are suffering from heat overload. In the plant world, exposure to radiation intensity exceeding the tolerance threshold of the photosynthetic apparatus leads to severe physical damage. Without timely intervention, the plant's vascular system will completely collapse.
First, let's perform a Clinical Diagnostic. How do you distinguish between a plant that is simply underwatered and one suffering from Heat Stress? Observe the "pixels" on the leaf surface. If you see Sunscald appearing on the leaf edges or silvery-white spots due to destroyed chlorophyll, accompanied by Wilting even when the substrate remains moist, then congratulations—you are facing a genuine case of heat stress. At this point, the Turgor pressure within the cells has spiraled out of control because the rate of Transpiration far exceeds the root system's ability to replenish water.
To handle this situation, we need to implement a strict Recovery Protocol:
- Relocation: Immediately move the subject to a shaded area or a location with strong filtered light. The goal is to eliminate the direct radiation source that is "baking" the organelles.
- Thermal Cooling: Use a pressure sprayer to create a misting effect around the foliage. Note: This is an Evaporative cooling mechanism. Lowering the surrounding ambient temperature will reduce the transpiration pressure on the plant.
- Zero-Fertilizer Policy: This is a "Fatal Error" many people make. When a plant is stressed, its metabolic system is at a standstill. Adding fertilizer (especially mineral salts) increases the osmotic pressure of the soil, making it even harder for roots to absorb water, leading to double "root burn."
"In a state of heat shock, plants need Stability more than Stimulation. Any attempt to force growth at this time is an act of biological poisoning."
| Parameter | Heat Stress Condition | Corrective Action |
|---|---|---|
| Leaf Status | Scorched, curled edges, loss of chlorophyll color. | Lightly prune completely dead parts to reduce energy consumption. |
| Soil Moisture | Still moist but the plant is wilting (Physiological shock). | Maintain moderate moisture; do not overwater to avoid root rot. |
| Nutrition | Excess mineral ions putting pressure on roots. | Suspend all fertilization activities for at least 2 weeks. |
Remember, the Recovery phase can take anywhere from a few days to several weeks depending on the extent of damage to the meristematic tissue system. Persistently keeping the plant in a stable, cool environment is the key to "rebooting" its entire biological system after an extreme "overheat" phase.
5. Special Care Process After the Plant Is Out of Critical Condition
Congratulations! Your plant has successfully performed a system "reboot" from a near-death state. However, do not become complacent just yet. At this moment, the plant's biological machinery is in an extremely fragile state, much like a server system that has just been restored after a Total System Crash. This phase is not the time to "force" growth but rather to re-establish Homeostasis.
"Resuscitating a plant is not about providing maximum nutrients, but about fine-tuning environmental parameters so that cells can perform the natural self-healing process."
First, let's discuss Hydraulic Control. A fatal mistake made by most plant enthusiasts is drenching the plant with water as soon as they see it revive. You must understand that the root system (xylem) is still damaged, and its ability to transport water to the leaves is extremely low. Reduce the watering volume to a minimum, maintaining just enough moisture in the substrate to stimulate the roots to "strive" to find water, thereby triggering natural growth mechanisms. Excessive humidity during this stage will lead to oxygen saturation, causing secondary root rot due to opportunistic fungi attacks.
| Parameter | Resuscitation Mode (ICU) | Technical Objective |
|---|---|---|
| Water Volume | 30% - 40% of normal | Avoid root suffocation, stimulate roots to seek water |
| Support Agents | B1 (Thiamine), Diluted Humic Acid | Catalyze metabolism, improve substrate structure |
| Light | Diffused (Par 100-200 umol/m2/s) | Reduce photosynthetic pressure on weak foliage |
| Air Humidity | 70% - 85% | Reduce water loss through Stomata |
Next is the intervention with Bio-activating chemicals. I am extremely excited to talk about the combination of Vitamin B1 and Humic Acid during this phase. Vitamin B1 (Thiamine) acts as a "Co-enzyme" in carbohydrate metabolism, helping the plant reduce oxidative stress very effectively. Meanwhile, Humic Acid, with its complex molecular structure, acts as a "conditioner" helping to release mineral ions locked in the soil, while creating an ideal environment for endogenous Auxins to develop. Use it at an extremely diluted concentration (only about 1/2 or 1/3 of the recommended dose on the packaging) to avoid causing osmotic shock to newly formed root hairs.
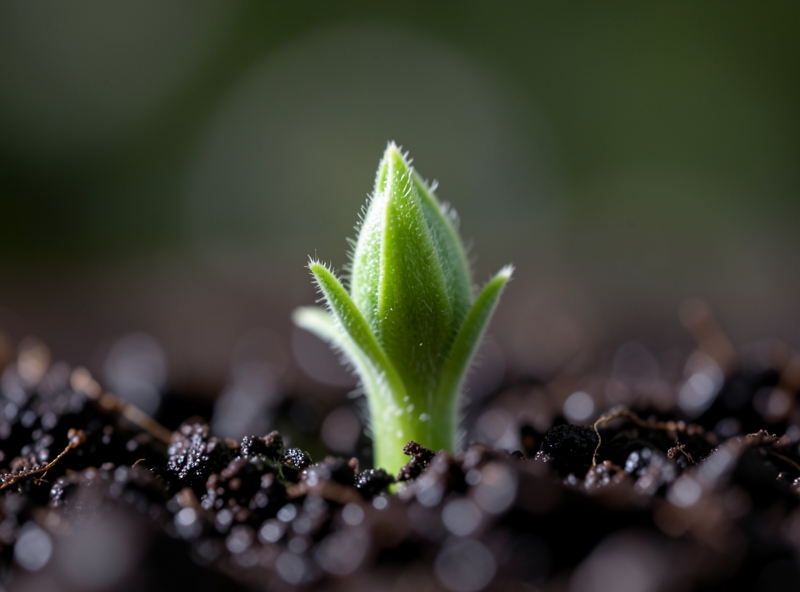
Finally, observe the actual "Data Logs" from the plant: New Buds and Growth Tips. When you see new buds starting to break through their protective layers, that is when you can begin the Acclimatization process. Do not move the plant into harsh sunlight immediately. Adjust the position so the plant receives an additional 10-15% light intensity each week. This "re-calibration" process helps newly formed leaf cells develop a thick enough cutin layer to withstand UV rays and strong transpiration. If new buds show signs of burnt edges or discoloration, immediately take a step back in the adaptation process to protect your resuscitation results.
- Note: Absolutely do not use chemical fertilizers with high Nitrogen (N) content during this phase as it will rupture the developing young cell structures.
- Geek Tip: You can use a perforated transparent plastic bag to create a "mini greenhouse" effect, maintaining stable vapor pressure around the foliage.
6. Frequently Asked Questions (FAQ) about the Houseplant Rescue Process
Welcome, garden "system admins"! When starting to "debug" a living entity experiencing system errors (wilting, yellowing leaves), we need highly accurate data rather than mere guesswork. Below is an in-depth analysis of the most common "bugs" I have compiled from thousands of hours of observing plant cells.
Question 1: How do I accurately distinguish between yellow leaves caused by under-watering and over-watering?
This is a classic problem of cellular turgor pressure. Technically, both states lead to Chlorosis (loss of chlorophyll), but the physical mechanisms are completely different. Observe the comparison table below to make an accurate "diagnosis":
| Metric | Over-watering | Under-watering |
|---|---|---|
| Leaf Structure | Soft, mushy, "waterlogged" feel; even young leaves fall off. | Dry, brittle, leaf edges curling like burnt paper. |
| Color | Pale yellow, usually starting from the old leaves at the base. | Yellow-brown, dry and scorched from the tips or edges inward. |
| Root Zone | Sticky, with a strange odor (due to anaerobic bacterial decomposition). | Bone dry, shriveled rootlets, soil pulling away from the pot walls. |
Question 2: Should I perform "repotting" immediately when the plant shows signs of severe wilting?
Absolutely NOT recommended to perform major surgery (repotting) unless you determine the core cause is Root Rot. Repotting while the plant is under extreme stress is like trying to upgrade hardware while the operating system is experiencing a "blue screen" – it only increases the risk of Transplant Shock due to the breaking of extremely fragile root hairs.
"In the plant rescue process, priority number one is stabilizing the environment (Homeostasis). Adjust light intensity and humidity before interfering with the physical structure of the root system."
Question 3: After optimizing care parameters, how long will it take for the plant to reactivate new leaf growth?
Recovery time depends on the metabolic rate of each species and the extent of damage to the meristem tissue. You cannot force a plant to run faster than its biological speed. The recovery process usually takes place in the following "latency" stages:
- Stage 1 (First 7-10 days): The plant focuses on restoring intracellular turgor pressure. You will see the plant stop wilting; leaves begin to feel firm again even if yellow spots remain.
- Stage 2 (2-4 weeks): The root system begins restructuring new root tips to absorb mineral ions. This is when the plant "loads data" in preparation for a growth spurt.
- Stage 3 (After 1 month): Dormant buds at the leaf axils will be activated by Auxin and Cytokinin hormones, beginning to push out new leaves (leaf primordia).
Don't get too excited and apply high doses of chemical fertilizer right now! Remember, newly grown roots are very sensitive to high mineral salt concentrations. Let the plant "reboot" its system as naturally as possible.