
1. The Importance of Pet First Aid Skills at Home
You know, on those afternoons spent sipping coffee, watching your little dog busily chewing on a favorite toy, we often never think of "heart-stopping" scenarios. But life sometimes throws us curveballs: a piece of bone stuck in the throat, an unexpected fall from the balcony, or simply a bee sting while they are busily chasing butterflies. In those moments, first aid knowledge is no longer just dry theory in a newspaper, but the only lifebuoy helping you keep your "little friend" by your side.
Home pet first aid is not actually an attempt to replace the role of a veterinarian. Think of it like bandaging a scratch for a younger sibling before heading to the hospital. It is a bridge of life, consisting of temporary but decisive interventions to prevent the situation from worsening. Many people mistakenly believe that simply rushing the animal straight to the clinic is enough, but in reality, there are incidents where a delay of just 5 minutes can make all subsequent efforts by the doctor futile.
In professional circles, we often refer to the concept of the "golden hour." This is the extremely short period after an accident occurs – a time when a proper chest compression or timely bleeding control can help a pet survive. If you master these skills, you are directly extending this "golden hour," helping the pet's body maintain basic functions until specialized medical equipment can be reached.
"First aid is not just about saving a life; it is also an act that demonstrates the deepest responsibility and love you have for your four-legged friend."
However, there is a "steel rule" I always remind my friends: Before you touch the animal, provide first aid to your own mind first. When pets are in an accident, they often fall into a state of panic and pain, and may bite their owners out of defensive instinct. If you are also frantic and trembling, your heart rate will spread to them, making the situation even more chaotic. Keeping a cool head and breathing deeply to make wise decisions is the key to every successful home rescue.
- Proactive control: Knowing how to safely restrain the pet so as not to worsen the injury.
- Maintaining life: Understanding how to check breathing and pulse, and how to handle an obstructed airway.
- Minimizing after-effects: Proper first aid helps minimize internal organ damage or subsequent infections.
- Saving time and cost: A wound that is cleaned properly from the start will make the treatment process at the clinic smoother and faster.
Don't wait until an incident happens to start searching for information. Equipping yourself with a solid foundation of first aid skills is like having a fire extinguisher ready in your home – you hope you never have to use it, but if needed, it will protect your entire small world.
2. Handling Choking and Foreign Object Obstruction
Don't expect your pet to signal calmly when choking like they do in cartoons. The reality is much more brutal: it's a chaotic battle between survival instinct and extreme panic. If you think you can just reach into their throat and pull the object out, prepare yourself for a bone-deep bite. Before playing the "hero," look at the reality of the warning signs.
A truly choking animal won't just cough violently (sometimes that's just bronchitis or kennel cough). Watch for three "deathly" signs: First, the pet frantically paws at its mouth as if trying to tear something out from inside. Second, the gums and tongue turn from pink to purple or pale blue due to lack of oxygen. Third, they try to breathe but there is no sound or only a weak wheezing noise. If you see these, your time is measured in seconds.
Before performing any maneuver, remember the golden rule: Absolutely do not put your hand in their mouth if the pet is still conscious and panicking. The instinct of a choking animal is to bite down on anything obstructing its airway, including the owner's fingers. Use a flashlight for a quick check; if you see a foreign object that can be easily removed with tweezers (forceps), do it. Otherwise, proceed to the Heimlich maneuver depending on their size.
| Subject | Technique | Important Notes |
|---|---|---|
| Cats & Small Dogs | Lift the two hind legs up or hold them with their back against your chest. Use your palm to give firm but controlled slaps on the back area between the shoulder blades. | Too much force can break ribs or bruise lungs. Use just enough force from the wrist. |
| Large Dogs | Stand behind them, wrap your arms around their waist. Make a fist and place it just below the breastbone in the abdomen area. Perform 5 sharp thrusts upward and forward (J-shape). | If the dog is lying down, place one hand under the back for support and use the other hand to press firmly on the abdomen area below the ribs. |
"The difference between saving a life and causing further injury to a pet lies in calmness. A misplaced Heimlich thrust can rupture the liver or spleen, but standing by in fear means accepting loss."
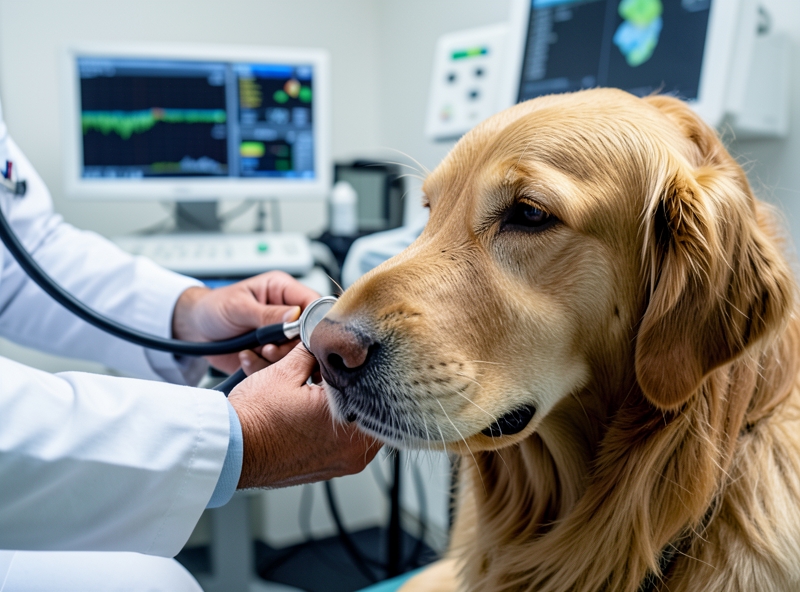
After the foreign object has been expelled, don't be foolish enough to think it's all over and go back to watching TV. The object may have scratched the esophagus, caused laryngeal edema, or more seriously, prolonged oxygen deprivation could cause brain damage that you cannot see with the naked eye. Taking your pet to the veterinary clinic immediately for an endoscopy or X-ray is not a waste of money, but the final act of vigilance required of a responsible owner.
3. First Aid for Pets with Food or Chemical Poisoning
Poisoning is a race against time. In veterinary medicine, the "golden window" for managing toxins is usually limited to the first 1-2 hours after exposure. Correctly identifying the agent and reacting accurately at home not only minimizes internal organ damage but also directly determines the pet's survival chances before reaching professional medical help.
Below is a list of the most common toxic agents in urban environments:
- Hazardous foods: Chocolate (contains theobromine), Xylitol sweetener (in chewing gum), raisins, onions, and garlic.
- Household chemicals: Floor cleaners, drain openers, fabric softeners, and concentrated essential oils.
- Potent toxins: Rodenticides (containing anticoagulants), herbicides, and human pain relievers like Paracetamol (especially fatal for cats).
"The biggest mistake owners make is panicking and trying to induce vomiting at all costs. In many cases, improper vomiting is more dangerous than the toxin itself."
When a pet is found to have been exposed to a toxin, owners should immediately perform the following practical first aid steps:
| Situation | Practical Actions | Important Notes |
|---|---|---|
| Contact with fur/skin | Wash immediately with warm water and mild soap. | Prevent the pet from licking its fur to avoid toxin ingestion. |
| Ingesting corrosive chemicals | Absolutely DO NOT induce vomiting. | Corrosive substances (acids/alkalis) will burn the esophagus a second time when vomited. |
| Ingesting foreign objects/food | Only induce vomiting when directed by a veterinarian. | 3% hydrogen peroxide can be used (dosage per professional guidance). |
A detail often overlooked but of extremely high practical value: Collect toxin samples. Do not just describe them verbally at the clinic. Take photos of chemical labels, bring food samples, or even a portion of the pet's vomit in a sealed plastic bag. This data helps the veterinarian identify the specific active ingredient to use the corresponding antidote instead of blindly treating symptoms.
If the pet shows signs of seizures, coma, or difficulty breathing, skip all home first aid steps and go straight to the nearest veterinary facility. In this state, any oral intervention carries a risk of aspiration pneumonia, making the situation many times worse.
4. Bleeding Control and Fixation of External Injuries
Throughout humanity's journey across millennia, from nomadic tribes on vast steppes to modern metropolises, the bond between humans and pets has always been tested by the harsh twists of fate. When a small creature is injured, the owner's hands serve not only as first-aid tools but also as a spiritual anchor, a bridge connecting to life. Techniques for bleeding control and injury fixation are not merely dry medical knowledge, but an "art of empathy" and calmness.
"First aid for pets is a ritual of kindness, where compassion is manifested through precise actions to preserve the breath of life."
When faced with a bleeding wound, the priority is to keep a cool head. Use clean gauze—a material representing civilization and hygiene—placing it directly onto the wound. Moderate pressure from your palm will allow platelets to fulfill their sacred mission: forming blood clots to prevent the life stream from escaping. Note that you should not constantly lift the gauze to check; if it becomes soaked, place a new layer of gauze over the old one. Perseverance in this moment is the key to preserving life.
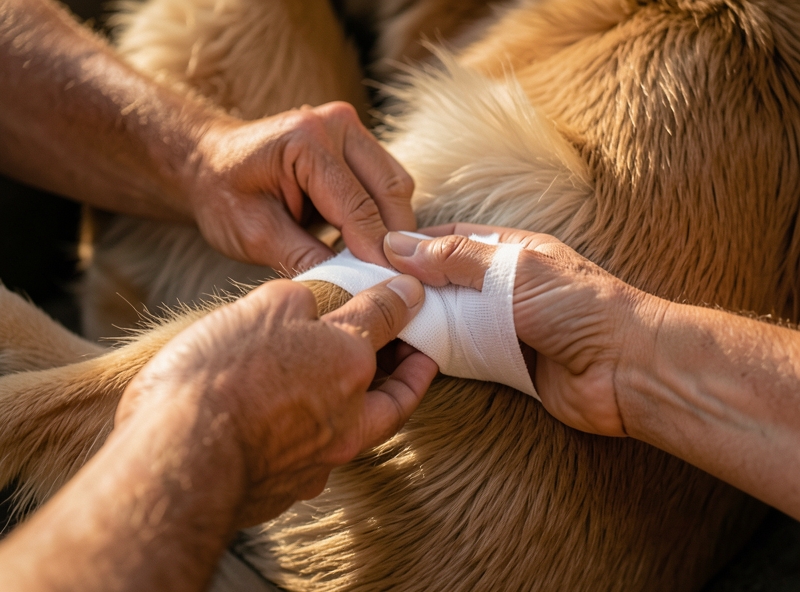
In cases where a fracture is suspected—an injury reminding us of the fragility of biological structures—immobilizing the injured limb is mandatory. You can use common but highly practical household items like rulers, stiff cardboard, or small wooden slats as makeshift splints. Wrap the splint in soft cloth before applying it to the pet's limb, then secure it with tape or fabric strips. The goal is not to realign the bone, but to create a "temporary framework" to prevent broken bone fragments from further damaging surrounding blood vessels and nerves.
Finally, the method of transportation is the stage requiring the highest level of subtlety. A large towel or a makeshift stretcher from a coat can become a "palanquin" protecting the pet from unnecessary vibrations. Movement should be carried out according to the following principles:
- Use a hard, flat surface: For spinal or pelvic injuries, place the pet on a board or a large tray to keep their body straight.
- Restrict movement: Wrap a large towel around the pet's body (cocoon style) to minimize struggling due to pain while keeping the animal warm.
- Maintain a natural posture: Always keep the pet's head and neck in the most comfortable position to ensure the airway remains unobstructed during transport to the nearest medical facility.
| Injury Type | Preferred First Aid Materials | Important Notes |
|---|---|---|
| External Bleeding | Sterile gauze, clean cloth | Apply direct pressure, do not remove old gauze |
| Limb fracture | Wooden splint, cardboard, roller bandage | Immobilize above and below the joint of the fractured area |
| Internal organ/spinal injury | Hardboard, large towel as stretcher | Never let the pet walk on its own |
Looking back at history, pet care has evolved from rudimentary folk experiences into standardized scientific procedures. However, the core value remains unchanged: it is the combination of practical knowledge and a heart always devoted to life. Mastering these techniques not only helps you protect your four-legged friend but is also our way of respecting life in its purest form.
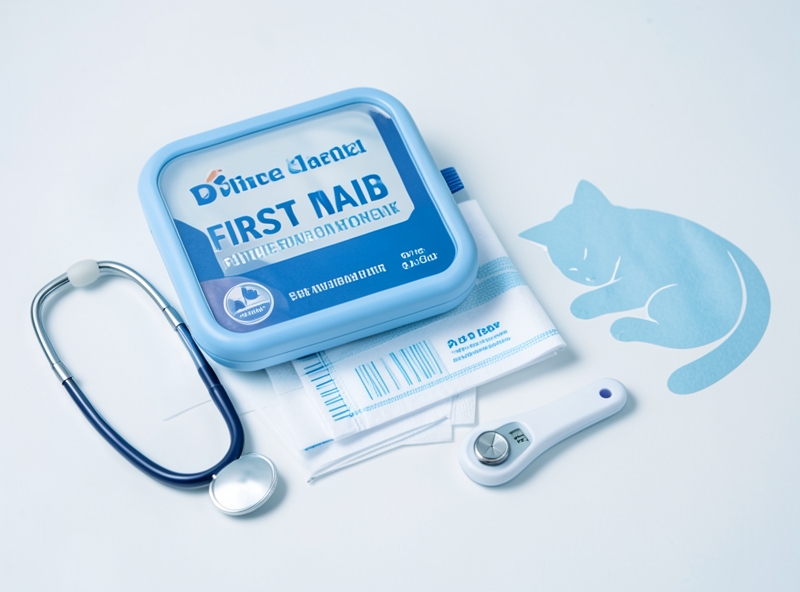
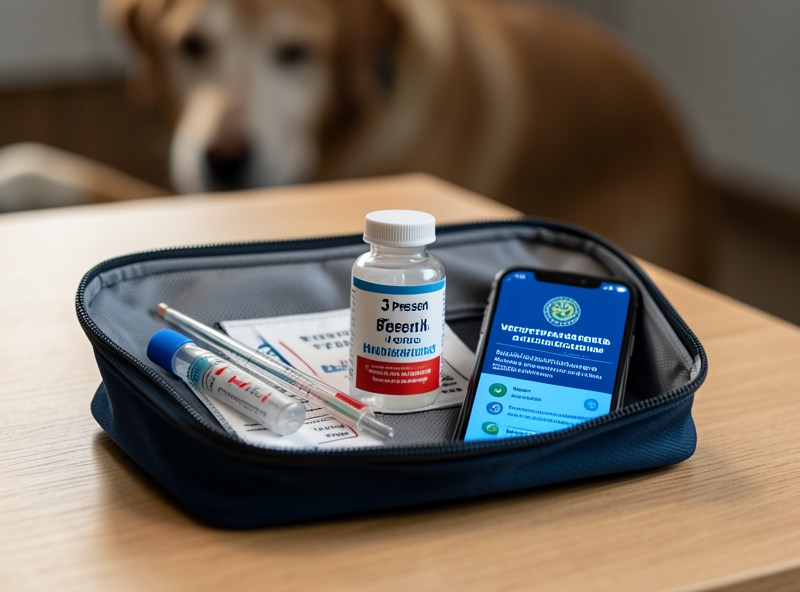
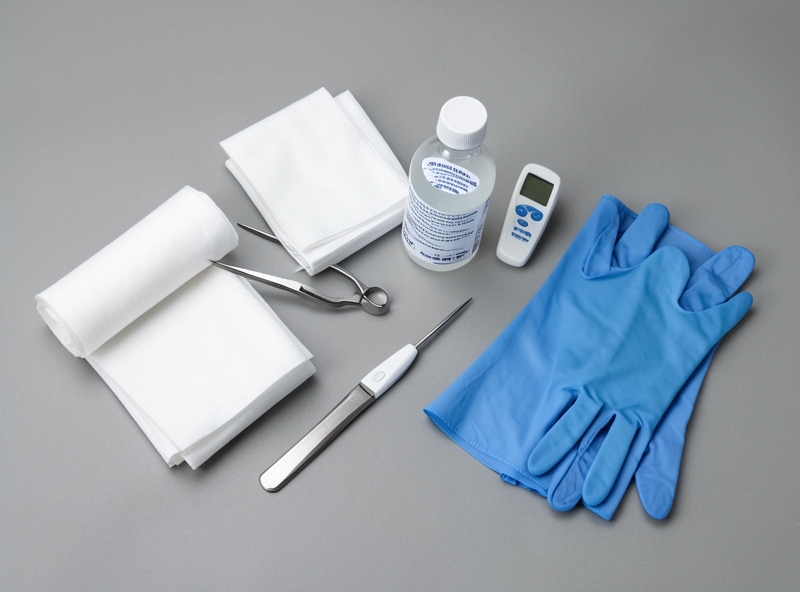
5. Preparing an Essential Pet First Aid Kit
In practical veterinary medicine, the ability to intervene promptly during the "golden period" following an accident or sudden health crisis plays a decisive role in an animal's recovery prognosis. Establishing a specialized First Aid Kit is not merely physical preparation but a component of scientific risk management in home pet care.
A standard first aid kit should be composed of medical supply groups capable of handling common situations such as soft tissue injuries, foreign objects, or body temperature fluctuations. The list of essential items includes:
- Rolled bandages and sterile gauze: Used to control bleeding and protect open wounds from environmental impacts, preventing secondary infections.
- Saline solution (NaCl 0.9%): The optimal isotonic solution for flushing wounds, removing debris, and cleaning natural cavities (eyes, nose) without causing tissue irritation.
- Medical tweezers: A support tool for removing foreign objects such as splinters, glass shards, or parasites (ticks, fleas) firmly attached to the skin.
- Digital thermometer: Body temperature is the most critical clinical data point for assessing shock, fever, or hypothermia (normal body temperature for dogs and cats typically ranges from 38°C to 39.2°C).
- Medical gloves: Ensure sterile conditions for the pet and protect the person performing first aid from zoonotic pathogens.
The effectiveness of first aid depends on the coordination between supplies and communication. Real-world data shows that in emergency situations, pet owners often panic, leading to delays in seeking professional assistance. Therefore, a list of phone numbers for 24/7 emergency veterinary clinics must be permanently posted inside the kit.
| Information Category | Detailed Requirements | Purpose of Use |
|---|---|---|
| Nearest veterinary facility | Address and 24/7 hotline | Fastest transport when surgical intervention is required. |
| Treating veterinarian | Personal/clinic phone number | Remote consultation based on the pet's medical history. |
| Vaccination records | Copy of documents or QR code | Provide immunization data for the emergency doctor on duty. |
"First aid is not a substitute for professional treatment, but it is a barrier preventing the decline of a pet's physiological functions before formal medical services can be reached."
Periodically checking the first aid kit every 6 months is necessary to ensure the expiration dates of antiseptic solutions and the adhesiveness of medical tapes. Maintaining the readiness of this kit is a testament to a pet care approach based on responsibility and scientific knowledge.
6. Summary
Don't delude yourself into thinking that after you perform a few basic bandages or give your pet some sugar water, all danger has passed. The reality is much harsher: what you see on the surface is sometimes just the tip of the iceberg. First aid, after all, is only a temporary "agreement" with death to buy more time, not a definitive cure.
| Stage | Nature of Action | Realistic Goal |
|---|---|---|
| Home First Aid | Temporary, quick response using available tools. | Maintain basic life support, prevent immediate worsening. |
| Medical Intervention | In-depth, supported by equipment (X-rays, tests). | Identify internal organ damage, infection, or potential complications. |
Many pet owners often make the fatal mistake of seeing their pet look "alert" after first aid and deciding to cancel the doctor's appointment to save costs. This is a gamble where the price paid is often the animal's life. A small wound can lead to sepsis, and a minor impact can cause internal organ crushing that the naked eye cannot see.
"A pet owner's hands can soothe temporary fear, but only the expertise and vision of a veterinarian can address the hidden seeds of danger deep within."
To become a truly responsible owner rather than just an emotional animal lover, you need to bear the following in mind immediately after finishing first aid:
- Absolutely do not self-medicate: Human pain relievers can be toxic to dogs and cats.
- Maintain the status quo: If possible, take a photo of the wound or bring the item the pet swallowed so the doctor has a basis for diagnosis.
- In-depth examination is mandatory: Even if the animal looks fine, blood tests or ultrasounds still need to be performed to rule out silent risks.
Ultimately, skepticism about a pet's ability to recover on its own is the best lifebuoy you can give them. Don't let complacency turn a minor accident into an irreversible tragedy.