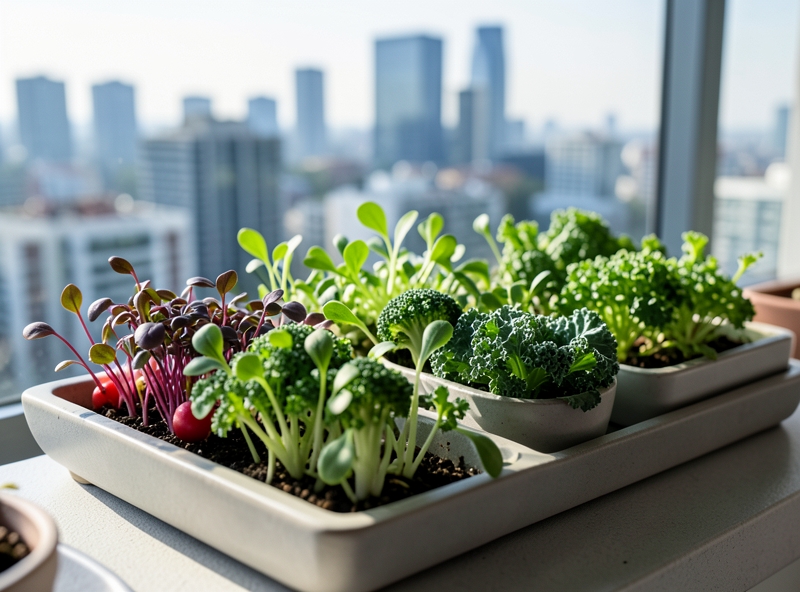
1. Microgreens: The Mini-Farm Trend for Modern Urban Dwellers
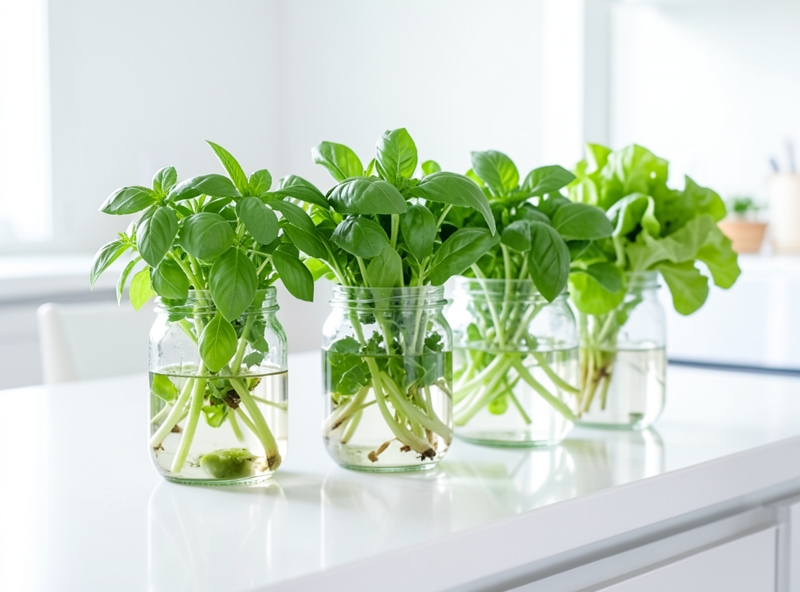
If you're picturing sprawling beds of lush greenery, think again. Microgreens are actually vegetables harvested at the seedling stage, right after the first pairs of true leaves appear. Don't confuse them with sprouts, which only require water and darkness; microgreens need light and a growing medium to synthesize nutrients. Many call this a "luxury hobby" for urbanites, but if we peel back the polished marketing layers, we see a much more practical reality.
The most valuable factor that saves microgreens from the "ornamental vegetable" label is nutrient density. Studies from the University of Maryland (USA) have shown that, depending on the variety, the amount of Vitamin C, E, and Beta-carotene in microgreens can be 4 to 40 times higher than in mature vegetables. This means that instead of having to "stuff" yourself with a large plate of lettuce, you only need a small handful of microgreens to achieve the same effect. This is an economic calculation for health for busy urban residents who are constantly deficient in fiber and micronutrients.
| Comparison Criteria | Microgreens | Mature Veggies |
|---|---|---|
| Harvest Time | 7 - 14 days | 45 - 90 days |
| Nutritional Content | Very high (concentrated) | Standard |
| Cultivation Area | Only needs a few small trays on shelves/balconies | Requires large foam boxes or a wide garden area |
| Care Effort | Low (mainly misting) | High (fertilizing, pest control, weeding) |
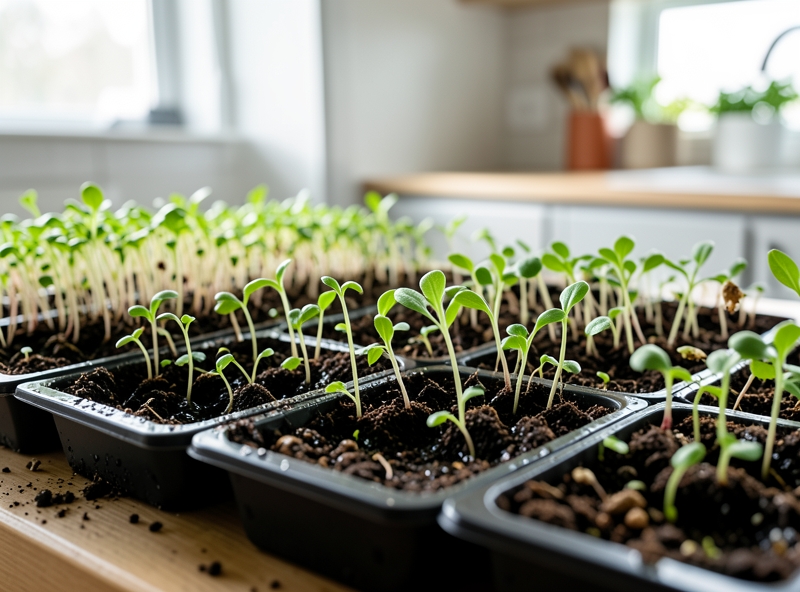
Many are skeptical about the feasibility of "farming" a 40m2 apartment. In reality, microgreens are the most "easy-going" plants you can find. You don't need a sun-drenched balcony or a complex hydroponic system. All you need is a shallow plastic tray, a little coco coir, and quality seeds. With a lightning-fast harvest cycle of just 7 to 10 days, this is a form of cultivation that brings extremely quick psychological "rewards," dispelling the worry of plants dying before they can grow for beginners.
"Growing microgreens at home is not merely farming; it is a way to optimize space and time to control the freshest food source possible in the heart of the city."
However, don't let "zero-cost" advertisements mislead you. Although space and time are minimal, you still have to invest in standard seed sources (non-chemically treated) and clean growing media to avoid mold—the number one enemy of microgreens in poorly ventilated environments. If you can overcome these basic technical barriers, owning a "mini-farm" right on your kitchen shelf or windowsill is completely within reach, instead of having to pay premium prices for tiny boxes of greens in organic supermarkets.
- Priority seeds: White radish, broccoli, water spinach, sunflower.
- Minimalist tools: Recycled plastic trays, mist spray bottle, coco coir medium or specialized paper towels.
- Important notes: Avoid overwatering which causes root rot, and ensure a well-ventilated space to prevent pathogens.
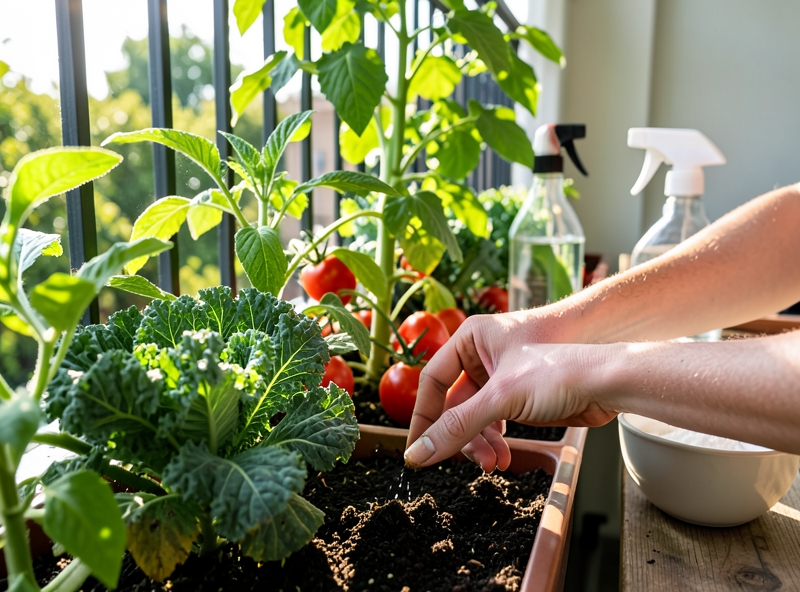
2. Preparing Supplies on a Budget: Making the Most of Your Balcony Space
Many people mistakenly believe that to have an "Instagrammable" balcony garden, they must pour money into glossy ceramic pots or expensive automatic irrigation systems. In reality, that is just how agricultural supply stores pick your pocket. For pragmatic "urban farmers," spending millions of VND on a few square meters of balcony is a pointless waste. Our goal is a green ecosystem with a budget of under 100,000 VND. If you cannot achieve that, perhaps you should just continue buying vegetables at the market for convenience.
Look at the list of supplies below with the eye of a calculator, rather than a dreamer:
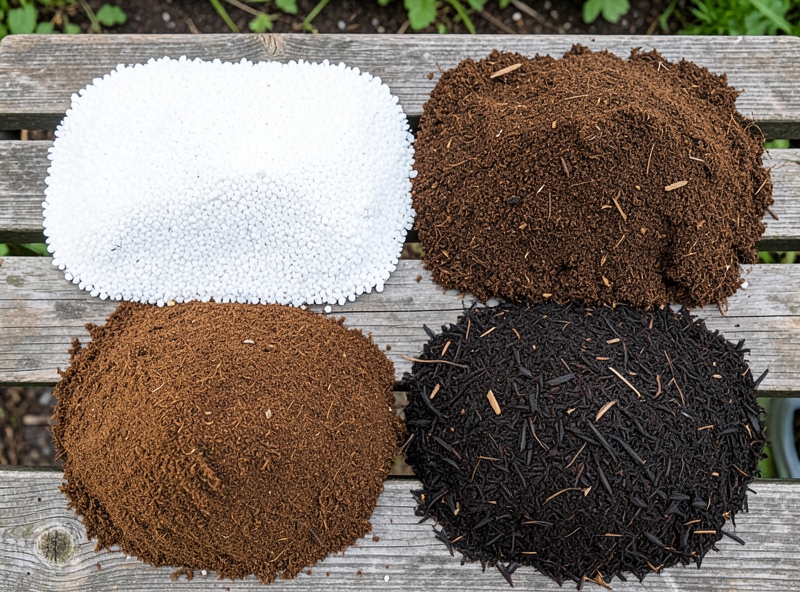
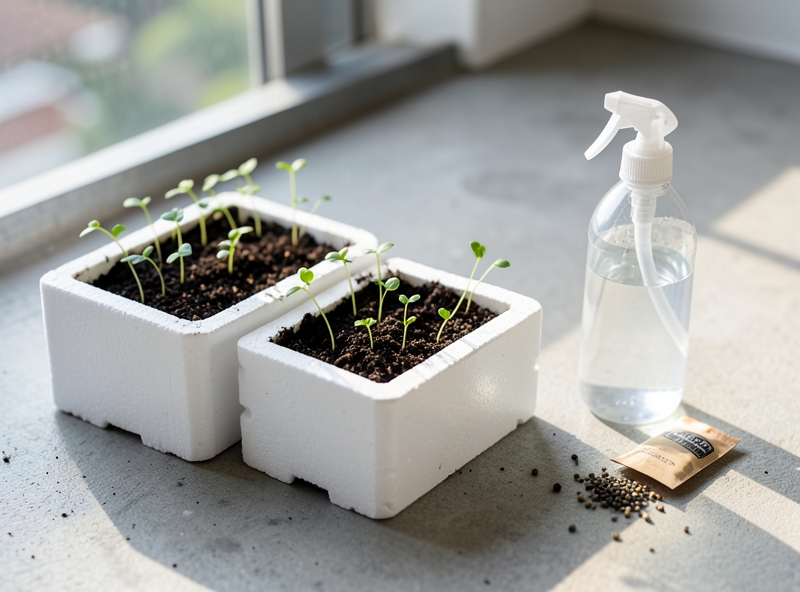
- Planting trays: Forget about those expensive composite plastic trays. Utilize discarded Styrofoam boxes from fruit stores or recycled plastic trays. They are free (or dirt cheap), retain heat well, and are extremely lightweight—a vital factor in protecting your balcony's load-bearing structure.
- Substrate: Don't be foolish enough to haul heavy bags of impure soil home. Choose processed coco coir or basic bagged clean soil. Even for microgreens, a bit of medical cotton or thick paper towels is enough for seeds to germinate. Plants need nutrients and moisture; they don't need luxury.
- Seeds: Choose "tried and true" varieties. Microgreens, sunflowers for seeds, or red radishes are the most practical choices. They grow quickly (harvestable in just 5-7 days), have few pests, and high germination rates, helping you avoid a sense of failure from your very first trial.
- Mist sprayer: The cheapest 1.5-liter plastic bottle is sufficient. Excessive water pressure from a regular hose will only crush the sprouts and wash away the substrate.
"Home gardening is not an equipment arms race; it is the art of cost management to yield the highest value of clean food."
To optimize the initial investment cost to below 100,000 VND, you need a cool head to allocate the budget as shown in the practical statistics table below:
| Item | Economical Way to Acquire | Estimated Cost (VND) |
|---|---|---|
| Trays/Styrofoam boxes | Ask at fruit stalls or reuse old plastic bins | 0 - 10,000 |
| Substrate (Clean soil/Coco coir) | Buy a 5kg bag at roadside plant shops | 25,000 - 35,000 |
| Seeds | Buy individual packets (Microgreens, red radish) | 15,000 - 25,000 |
| Mist sprayer | Common manual plastic type | 20,000 - 30,000 |
| Total | 60,000 - 100,000 | |
Don't let advertisements for "miracle fertilizers" or "smart pots" sway you. The essence of plants is the need for light, water, and patience. If you are willing to put in a little effort to poke drainage holes in a Styrofoam box and meticulously sow each seed, you have already triumphed over those who only know how to use money to buy momentary satisfaction. Your balcony may be small, but your gardening mindset must be large.
3. Expert-Standard 4-Step Process for Growing Microgreens
When people hear the word "expert," many immediately think of sterile laboratories or million-dollar hydroponic systems. In reality, Microgreens (tiny young greens) are a game of patience and humidity control techniques, not a place to glorify "miracle" fertilizers. Don't expect to throw a handful of seeds into the soil and instantly get a lush tray of greens like in a magazine if you haven't mastered these 4 practical steps below.
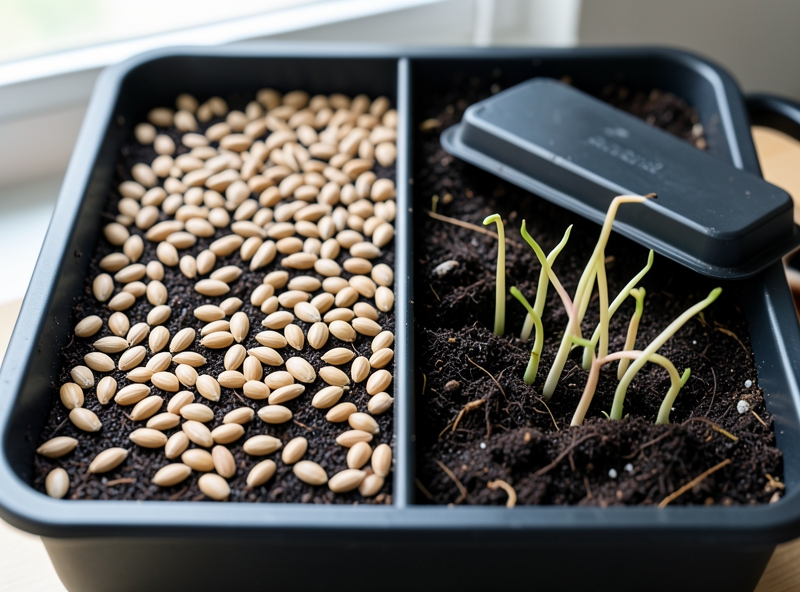
Step 1: Seed Treatment – Don't believe the "direct sowing" ads
Most seed retailers advise you to sow immediately to save effort, but that is the fastest way to get uneven germination. For thick-skinned seeds (sunflower, peas, radish), soaking in warm water (2 parts boiling, 3 parts cold) for 4-8 hours is mandatory to break dormancy. If you skip this step, harvest time will be delayed, and the rate of seed rot due to being waterlogged for too long in the growing medium will skyrocket.
Step 2: High-Density Sowing – The boundary between "yield" and "fungal disease"
Unlike traditional vegetables that need spacing, Microgreens require high-density sowing so they can "lean" on each other to stand firm. However, sowing too thickly will prevent air circulation at the base, creating conditions for mold to develop overnight. A practical rule: Seeds should cover the surface of the medium (coco coir or clean soil) but must not overlap by more than two layers.
Step 3: Blackout Technique – Deceiving the survival instinct
This is the stage where many beginners often "pity the greens" and bring them into the light too early. During the first 2 days after sowing, you need to use another tray to cover them tightly or use a dark cloth. The purpose is not to let the greens "sleep," but to stimulate the stretching reflex to find light (etiolation). When light is blocked, the plant will focus all its energy on elongating the stem instead of developing cotyledons too early. If you see pale yellow sprouts that look "lifeless" at this step, congratulations, you are on the right track.
"The difference between a professional Microgreens tray and an amateur one lies in the stem length. Proper blackout not only increases yield but also makes harvesting with scissors easier than ever."
Step 4: Exposure to Light – The chlorophyll revolution
After 48 hours of "imprisonment," move the tray to a location with indirect light (balcony, window). Don't be foolish enough to expose them to the harsh 12 PM sun unless you want to see the entire tray collapse from dehydration. With just gentle light, the photosynthesis process will occur, turning the pale yellow to a deep green in just a few hours. This is also the time you should water using a mist spray or bottom-watering to keep the leaves dry and avoid crushing them.
| Stage | Environmental Conditions | "Standard" Status |
|---|---|---|
| Day 1-2 | Complete darkness, lightly weighted | Roots firmly anchored, white stems reaching 2-3cm |
| Day 3-5 | Indirect light, well-ventilated | Cotyledons expanded, deep green color, sturdy stems |
| Day 6-7 | Preparing for harvest | Appearance of the first true leaf (depending on variety), most intense flavor |
This process might seem strict at first glance, but it is actually an operation based on the natural biological mechanisms of the seed. Strictly following the treatment and blackout steps will help you eliminate 80% of the risks of fungal disease and bitter greens – elementary mistakes that "super-fast growing" guides often ignore.
4. Chemical-Free Care and Pest Control Techniques
Don't be quick to believe advertisements about "self-sustaining organic vegetable gardens" or miraculous fertilizers that claim to fix every grower's mistake. In reality, most ornamental plants and green vegetables die on balconies not due to a lack of fertilizer, but because of the owner's over-enthusiasm and lack of knowledge. If you are still watering on a fixed schedule like a robot or mindlessly spraying dish soap on leaves, stop before you turn your garden into a green graveyard.
The most common mistake of amateur "farmers" is overwatering. Plants need oxygen to breathe through their roots, not a swimming pool. Watering every day regardless of the weather is the fastest way to create an anaerobic environment, causing root rot and inviting mold. Throw away that watering schedule and replace it with the "finger" rule: poke your finger about two knuckles deep into the soil; only water if it feels dry. When you water, soak it thoroughly until water drains from the bottom of the pot—don't just "skim the surface," leaving the soil surface wet while the roots below remain bone dry.
"Chemical-free gardening is not about blindly replacing pesticides with garlic and chili water, but about managing a miniature ecosystem based on meticulous observation and timely intervention."
Regarding mold and pests, don't daydream that spraying a few drops of vinegar will make everything disappear. When you see white spots like flour (powdery mildew) or a gray film on the leaves, it is a consequence of poor air circulation and excess humidity. Instead of looking for chemicals, learn how to mix a solution of baking soda (about 5g per 1 liter of water) with a few drops of cooking oil to increase adhesion. However, test it on a few leaves before spraying the entire plant, as a concentration that is too high will "burn" the leaves—a mistake that proponents of natural methods often ignore.
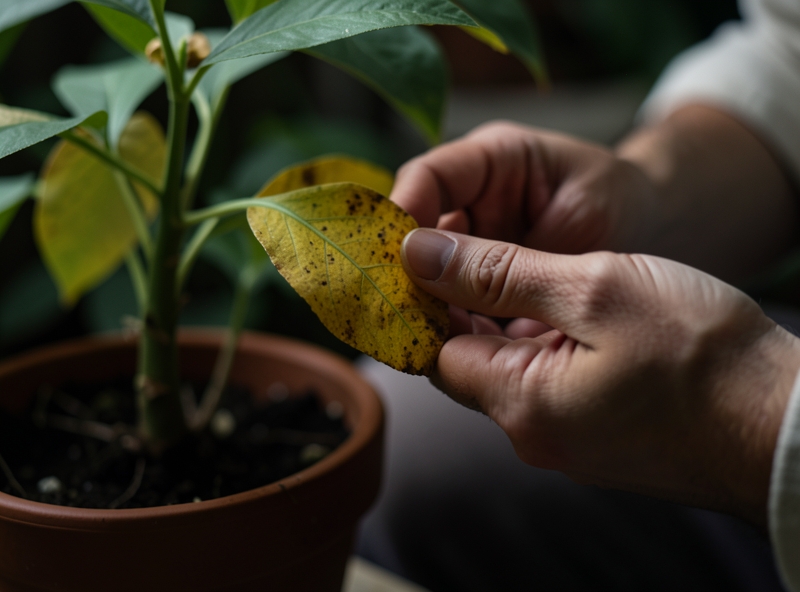
Speaking of balcony light, this is where many people's "dreams are shattered." Do you see your vegetables growing tall and spindly, with thin stems that collapse? This is "etiolation" due to a lack of sunlight. The plant is trying to stretch its stem to find a light source, but the price is weakness. An East or West-facing balcony does not mean every spot receives the same amount of solar energy. You need to observe the sun's intensity to arrange your plants: leafy greens need at least 4-5 hours of direct sunlight, while fruiting vegetables need more. Never place pots in stagnant, low-light corners and expect them to grow sustainably.
| Issue | Common Symptoms | Practical Solution (Chemical-Free) |
|---|---|---|
| Waterlogging/Root Rot | Leaves turning yellow simultaneously, soft/mushy base, foul odor. | Stop watering, check drainage holes, add coal slag or perlite to the soil. |
| "Leggy" Plants (Etiolation) | Long, thin stems, wide gaps between leaf nodes, pale leaves. | Move to a direct sun location, rotate the pot 180 degrees weekly. |
| Mold/Aphids | White powdery coating, black spots, or small organisms on the underside of leaves. | Use a high-pressure water hose to wash the leaves, spray Neem oil or a diluted baking soda solution. |
In conclusion, chemical-free gardening requires you to use your "brain" more than your "hands." If you don't have the patience to observe the changes in every leaf or the moisture of the soil, perhaps you should just buy vegetables at the market. But if you are determined, start by correctly understanding the biological needs of the plants instead of applying unfounded tips found online.
5. Harvesting and Storage to Preserve Full Crispness and Sweetness
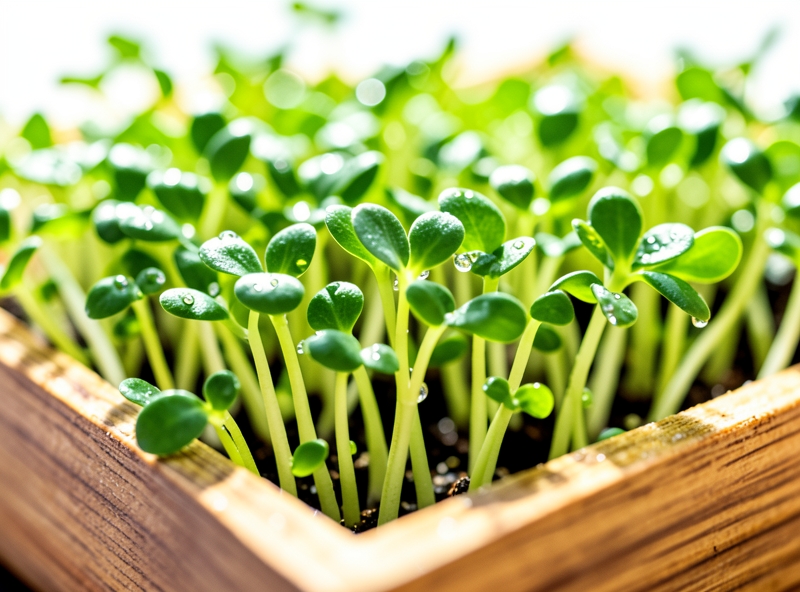
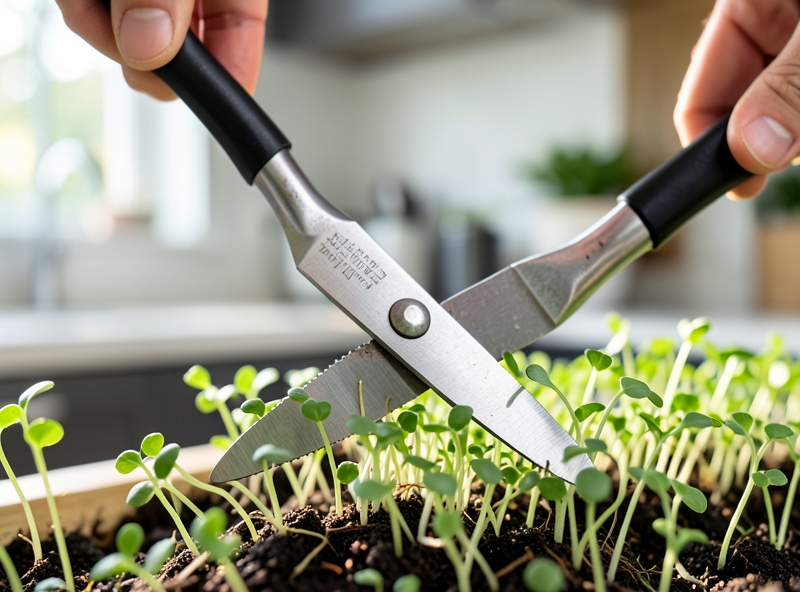
Don't let your care and effort go to waste due to careless harvesting habits. Many people still believe that the longer you leave the vegetables and the larger the plants grow, the more "profit" you get. In reality, in the world of urban gardening, delay only results in a handful of aged fiber and a bitter taste. The "golden" moment is not when you are free, but on the 7th day from when the second cotyledon appears. At this time, the nutrient content reaches its peak, and the cellular structure has not yet been lignified (turned to wood), providing a crunchy texture and a distinct mild sweetness that no market-bought vegetables can match.
"In the cultivation of microgreens and short-term vegetables, procrastination is the enemy of flavor. Just a 24-hour delay, and the sugar content will convert into tough cellulose."
Harvesting techniques also require pragmatism rather than emotional hand-picking movements. Forget the intention of pulling up the roots if you don't want to spend an hour cleaning sand and soil stuck in every crevice of the leaves. A specialized pair of sharp scissors is an indispensable item. Use a decisive motion, cutting close to the base but absolutely do not let the blades touch the substrate surface to avoid cross-contamination. After cutting, the vegetables need to be handled gently; do not blast them with strong water directly from the tap as if you were washing a car, as that will only crush the fragile leaf tissues, allowing bacteria to enter faster.
Regarding storage, be wary of advice to "leave vegetables in a basket for ventilation." Microgreens dehydrate faster than almost any other food. If not used immediately, follow this practical process to extend the shelf life of the vegetables up to 5-7 days without them becoming mushy:
| Processing Step | Standard Procedure | Practical Reason |
|---|---|---|
| Cleaning | Rinse quickly in a bowl of cold water, remove immediately. | Avoids the vegetables absorbing too much water, which causes waterlogging of the cells. |
| Drying | Use a salad spinner or pat gently with multi-purpose paper towels. | Excess surface moisture is the number one cause of rotting in the refrigerator. |
| Packaging | Line the inside of an airtight container or zip-lock bag with absorbent paper. | The paper acts as a moisture regulator, keeping the vegetables dry but not wilted. |
| Storage | Refrigerator crisper drawer (4-6 degrees Celsius). | Low temperatures inhibit the respiration process of the vegetables, preserving their sweetness. |
Remember that the refrigerator is not a "time machine"; it only slows down the decomposition process. A wise gardener harvests just enough for the day's needs. True freshness comes from shortening the distance from the growing tray to the dinner plate, not from owning a refrigerator full of containers of old vegetables.
6. Frequently Asked Questions (FAQ) about Home Microgreens Farming
Don't be quick to believe those glamorous Instagram photos with lush green sprout trays. The reality of home gardening is sometimes a mess of mold, odors, and trays of collapsed greens overnight. If you are struggling with your "mini-farm," take a hard look at these practical issues below before blaming the seeds or the weather.
Why are my sprouts falling over and rotting at the base?
Don't be quick to blame "bad luck." Collapsing greens usually stem from two very practical reasons: either you are sowing too densely, causing them to compete for oxygen and suffocate, or you are "torturing" them with overwatering. High humidity is a haven for mold. If you see brown, waterlogged stems, recheck the ventilation of the growing medium and stop spraying water indiscriminately immediately.
Do I need to add fertilizer to make the greens "super-sized"?
The short answer is: No. Advertisements for miracle fertilizers for microgreens are just a way to empty users' pockets. The seeds themselves contain enough nutrients to nourish the plant until it reaches the two-cotyledon stage. Adding chemicals to a growth cycle of only 7-10 days doesn't make the greens tastier; it only causes you to ingest useless fertilizer residues.
Warning: "Deadly" seeds that must absolutely not be used for microgreens
Many people mistakenly think that anything that sprouts is edible. This is a mistake that can lead to serious food poisoning. Stay away from the Nightshade family (Solanaceae), including: tomatoes, potatoes, eggplants, and peppers. The sprouts of these plants contain Solanine – a highly toxic alkaloid that can cause digestive and neurological disorders. Never test the courage of your digestive system with these green leaves.
How to have a continuous supply of greens every week without interruption?
The secret lies not in skill, but in time management – also known as the "staggered sowing" technique. Instead of sowing 5 trays at once and not being able to eat them in time, causing the greens to get old and bitter, break the process down according to the table below:
| Sowing Round | Sowing Time | Harvest Time | Practical Notes |
|---|---|---|---|
| Round 1 | Monday (Week 1) | Monday (Week 2) | For fast-growing varieties like bok choy or water spinach. |
| Round 2 | Thursday (Week 1) | Thursday (Week 2) | Sow just enough for 2-3 family meals. |
| Round 3 | Monday (Week 2) | Monday (Week 3) | Start a new cycle when round 1 is finished. |
"In urban agriculture, persistence is more important than technique, but staying alert to natural toxins is what's vital."
Growing Microgreens isn't hard; the difficulty lies in discarding lazy habits and unrealistic expectations from falsely advertised seed packets. Start with meticulous observation, and you will see that self-supplying clean greens is actually a problem of moderation, not a race for yield.