1. Challenges in Preserving Multi-Material Shoes Today
You've just spent a significant amount of money on your favorite sneakers, but after just a few ordinary washes, the suede turns stiff and rough, the mesh gets stretched and frayed, and the rubber sole starts yellowing? This scenario happens to everyone. The structural breakdown and discoloration of an expensive pair of shoes often occur much faster than you imagine, stemming directly from improper cleaning habits.
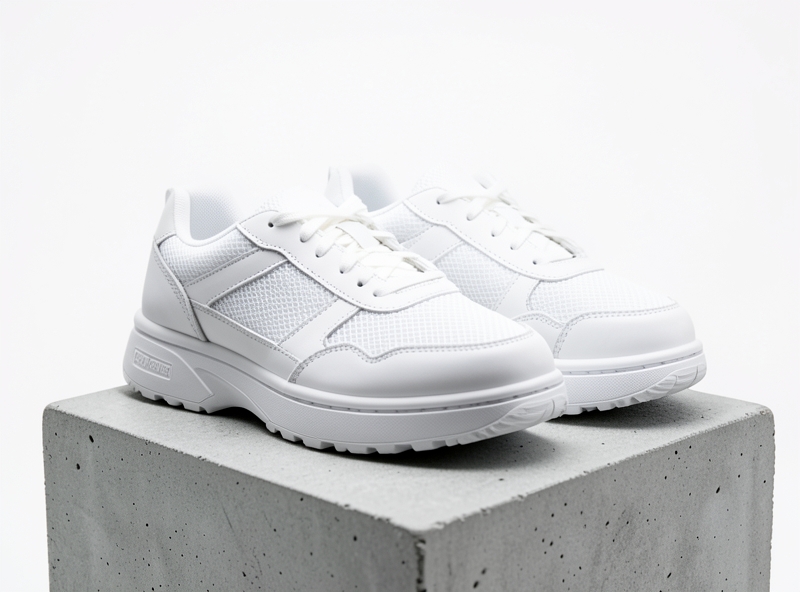
Top athletic fashion brands today rarely manufacture a shoe from a single material. To optimize the experience—from support and breathability to trendsetting aesthetics—the structure of a modern sneaker is a **complex combination** of breathable mesh (Mesh/Flyknit), synthetic leather, suede (Suede/Nubuck), and TPU plastic or rubber stabilizing pieces.
This diverse combination turns each pair of shoes into a miniature "ecosystem." The challenge lies in the fact that **each material has entirely contrasting characteristics** when exposed to water, temperature, and cleaning chemicals.
| Shoe Material | Structural Characteristics | Common Cleaning Mistakes | Damage Consequences |
|---|---|---|---|
| Mesh / Knit Fabric | Soft, highly breathable, dirt easily penetrates deep into fibers. | Scrubbing hard with a stiff-bristled brush. | Fiber separation, pilling, toe box deformation. |
| Suede / Nubuck | Extremely sensitive to water, easily loses its soft nap. | Spraying water directly or using high-pH soap. | Surface stiffness, color fading, patchy water stains. |
| Synthetic Leather | Protective film coating, easy to wipe but prone to cracking. | Using alcohol or strong chemical solvents. | Peeling coating layer, brittle leather, creasing cracks. |
| Rubber / EVA Sole | Good elasticity but susceptible to chemical and thermal oxidation. | Drying directly under harsh sunlight. | Yellowing glue, brittleness and cracking, reduced cushioning. |
When you use a bucket of regular soapy water and a single brush to scrub the entire shoe, you are accidentally causing a **chemical-mechanical conflict**. The cleaning solution that helps clean the rubber sole contains far too much alkalinity, causing mesh fibers to rot and suede to stiffen. The scrubbing force strong enough to remove dirt on synthetic leather is more than enough to **tear delicate woven bonds** on the upper.
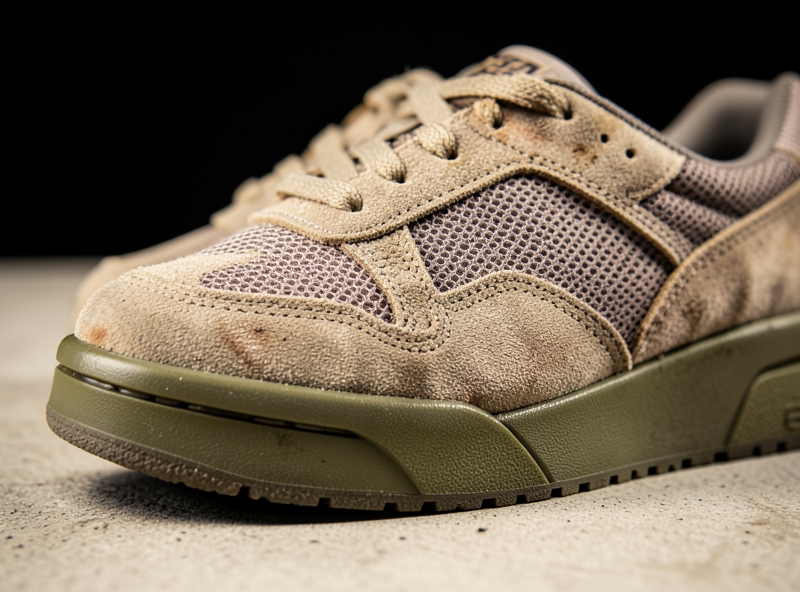
"Cleaning multi-material shoes is not simply an act of 'wiping away dirt,' but a chemical balancing art aimed at preserving textile fibers and maintaining the integrity of the original glue bonds."
Understanding chemical toxicity and mechanical action mechanisms is a mandatory first step. Proper cleaning techniques do not stop at keeping surfaces shiny, but also deliver **3 core values** that determine a shoe's lifespan:
- Shape retention: Prevents prolonged water soaking from softening internal cushioning layers, keeping the shoe silhouette from collapsing or misaligning after drying.
- Color fastness: Precise pH control prevents dye molecules on suede and mesh from bleeding or cross-staining adjacent light-colored areas.
- Longevity: Eliminates glue oxidation risks—the primary cause of **sole separation** or peeling of the expensive sole unit.
Meticulousness in categorizing and applying the correct cleaning method for each material section is the defining line between an amateur sneaker owner and a true sneaker care expert.
2. Dry Cleaning Process for Mesh and Synthetic Leather
Water is the hidden enemy that causes synthetic leather to peel and turns mesh fabric into a moldy breeding ground for bacteria. Improper wet washing weakens the fiber structure, reduces elasticity, and degrades the adhesive glue after just a few uses. The secret code to keeping your ergonomic chair, leather shoes, or sofa looking brand new is: Regular dry cleaning—a quick 3-minute operation that triples the lifespan of the material.
To achieve maximum cleaning efficiency without damaging the surface, the process requires absolute precision from the tools used down to the hand pressure applied.
Essential "tactical" toolkit to prepare:
- Horsehair brush (or ultra-soft synthetic bristles): Dense yet resilient bristles easily reach deep into the mesh pores without tearing or fraying the fibers at all.
- Dry Microfiber towel (minimum weight of 300 GSM): Microscopic fiber structure creates natural static electricity during movement, capturing fine dust entirely instead of scattering it around.
- Specialized Dry Eraser Block: The solution to eliminate black scuff marks and stubborn dry stains on PU/PVC leather without removing the protective glossy finish.
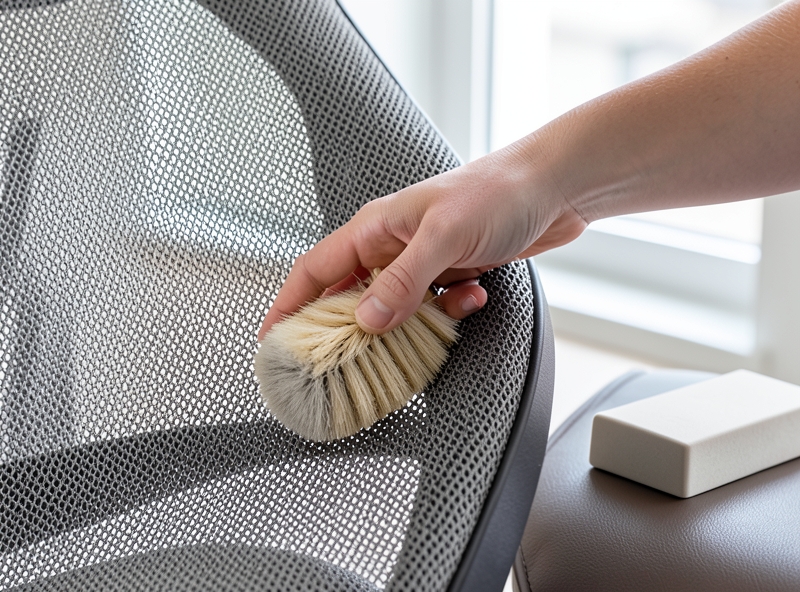
Precise operation techniques for each material:
For mesh fabric: Dirt often gets trapped deep inside the mesh holes. The most common mistake is scrubbing in circular motions. Apply the principle: "One direction - Gentle force - Soft patting". Lightly pat the back of the mesh surface so the vibration pushes fine dust out. Then, use a soft-bristle brush to gently stroke downward in a single vertical direction along the weave. This technique maintains the mesh shape and eliminates the risk of pilling.
For synthetic leather (PU/PVC): Synthetic coatings are highly sensitive to rough friction. First, glide a dry microfiber cloth lightly over the surface to collect airborne dust. For black scuff marks or stubborn stains, hold a specialized dry eraser at a 45-degree angle and gently move it along the stain. The friction from the eraser will lift away buildup without scratching or wearing down the leather layer.
| Material | Critical Mistakes to Avoid | Standard Dry Cleaning Technique |
|---|---|---|
| Mesh Fabric | Scrubbing in circles, using hard brushes that break weave fibers and cause pilling. | Pat gently to create vibration, brush downward in one direction with soft bristles. |
| Synthetic Leather (PU/PVC) | Wiping with dripping wet towels causing leather cracking/peeling, scratching with fingernails. | Collect dust with a dry microfiber cloth, erase black scuffs with a specialized eraser block. |
"The difference between an item that looks brand new after 5 years and one that degrades after 6 months lies not in the price tag, but in the everyday friction applied to its surface."
Performing this routine every two days will completely prevent persistent buildup, preserve the original material structure, and keep your living space fresh and clean.
3. Standard deep wet-cleaning process for rubber soles and uppers
Over 80% of cases where shoes suffer from patchy yellowing or widespread sole peeling stem from one mistake: rinsing water and scrubbing indiscriminately. When dealing with stubborn mud or long-standing stains, dry cleaning is not enough. You need a wet-washing process that is chemically and mechanically precise to thoroughly clean without destroying the shoe's structure.
Standard solution mix recipe: Mix 5ml of specialized cleaning solution (neutral pH between 6.5 - 7.5) with 500ml of warm water at a temperature of 30°C - 35°C. This temperature is sufficient to soften dried mud flakes and break grease bonds without melting the heat-activated sole glue.
The core key lies in the zoned scrubbing technique. The fiber density of mesh uppers, the structure of synthetic leather, and the roughness of rubber soles are completely different. Using a single stiff brush for the entire shoe is the fastest way to turn an expensive pair of shoes into trash.
| Zone | Surface Material | Recommended Tool | Precise Scrubbing Technique |
|---|---|---|---|
| Upper | Mesh, Flyknit, Canvas | Ultra-soft horsehair brush | Scrub gently in circular motions; never apply heavy horizontal or vertical pressure that causes pilling or stretches the woven fibers. |
| Upper Trim / Overlays | Synthetic Leather, TPU | Soft-bristle brush / Sponge | Scrub gently in one direction to push dirt out, avoiding scratching the glossy protective coating on the leather. |
| Sole Unit | Hard rubber, EVA, traction grooves | Hard nylon bristle brush | Apply firm pressure to scrub deep into each groove. Use a small detail brush to pick out lodged pebbles and debris. |
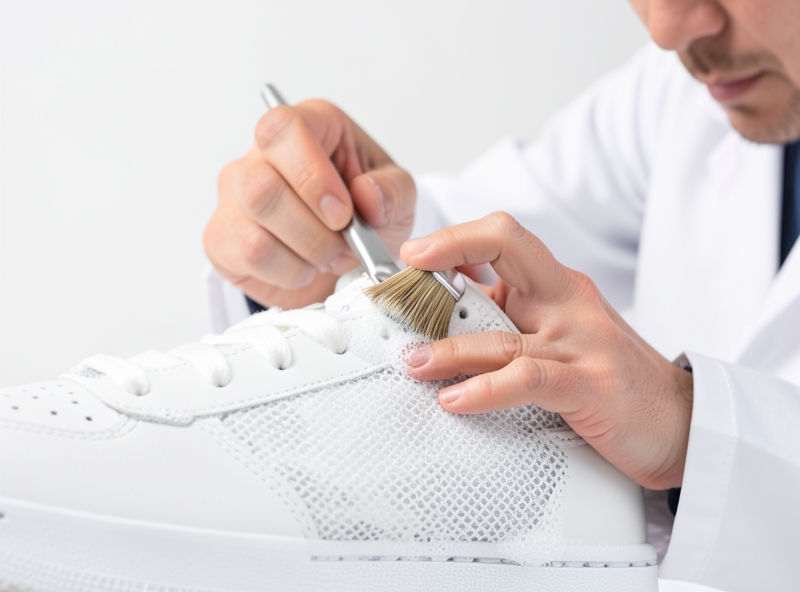
After scrubbing, the step that directly dictates aesthetics is rinsing off soap suds and eliminating residual alkaline deposits. Yellow stains appearing after drying are not caused by dirt, but by remaining soap suds trapped in the fabric fibers undergoing a photochemical reaction when exposed to sunlight.
- One-way rinse: Use a gentle stream of running water to rinse directly from the upper down to the sole. Avoid submerging the entire shoe in a basin for more than 3 minutes to prevent water from penetrating deep into the midsole foam layer.
- Moisture extraction with a microfiber towel: Wrap a dry, super-absorbent towel around the shoe upper, then use your palms to gently press continuously to absorb 70% of trapped water. Do not wring or twist the shoe.
- Anti-yellowing paper wrapping secret: Wrap 2-3 layers of white paper towels (dye-free and fragrance-free) completely covering the upper and sole. Thanks to capillary action, all excess alkaline residue and yellowing pigments trapped deep within the fibers will be drawn outward and adhere tightly to the paper layer during the drying process.
"The difference between a crisp, like-new pair of shoes and a damaged, yellowed pair lies in 3 minutes of proper foam rinsing and a protective layer of paper towels during drying."
Finally, place the shoes in a dry area with natural cross-ventilation and away from direct sunlight. Once the shoes are completely dry after 12–18 hours, simply peel off the yellowed outer paper layer to enjoy the result: a spotlessly clean pair of shoes that retains its original colors without expensive maintenance costs.
4. Drying Methods, Shape Retention, and Long-Term Color Preservation
80% of the most severe damage to a shoe doesn't come from active wear, but occurs during improper drying and storage. Yellowing, peeling glue, distorted shape, or stiffness after air-drying—these are direct consequences of a lack of understanding regarding temperature and materials. Cleaning accounts for only 30%, but drying and restoration represent 70% of what determines a shoe's lifespan.
"Sunlight is the number one enemy of adhesives and color pigments. One hour of exposure to harsh direct sunlight can destroy the polymer molecular structure of a shoe sole equivalent to 6 months of continuous use."
The Air-Drying Philosophy (Wind-drying): Never dry shoes directly under sunlight or use a high-temperature dryer. UV rays cause the adhesive to become brittle and crack, while triggering oxidative reactions that lead to permanent yellowing on canvas fabric or EVA foam soles. The standard method is to place shoes in a shaded, well-ventilated area, tilted at a 45-degree angle against a wall to allow water to drain out as quickly as possible via gravity.
Absolute Shape Retention Technique: Water softens the structure of fabric fibers and leather. If allowed to air-dry naturally without internal support, the surface will shrink or warp permanently. Apply these two standard shaping tools immediately:
- Cedar Shoe Tree: The ultimate choice for leather shoes and high-end sneakers. Natural cedar wood absorbs internal moisture extremely fast, eliminates odor-causing bacteria, and maintains perfect tension to preserve the shape.
- Soft, unprinted absorbent paper: For thin fabric or knit shoes (Primeknit/Flyknit), crumple soft white paper tightly into the toebox. Never use printed newspaper with ink as the ink will bleed into the shoe lining when damp. Replace with fresh paper every 2–3 hours during the initial phase.
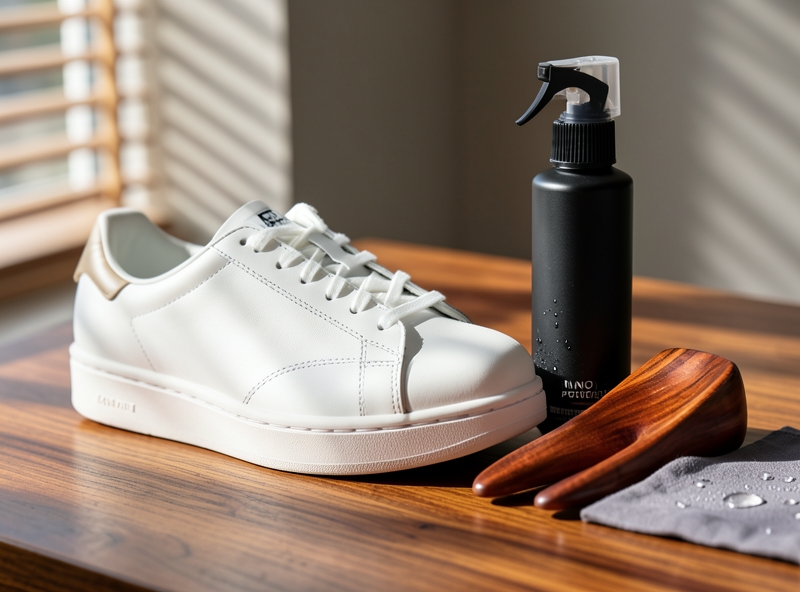
Creating a Nano "Armor" Against Water and Stains: After the shoes are 100% completely dry, this is the golden moment to lock in the results. Nano waterproof spray creates a molecular-level Lotus Effect, preventing liquids, mud, and dirt from adhering to multi-material surfaces (Suede, Nubuck, Canvas, Mesh).
- The 20cm Distance Rule: Hold the spray can precisely 15–20cm away from the shoe surface. Apply a thin, even coat using horizontal motions.
- The Rule of Two Thin Layers Over One Thick Layer: Allow the first coat to dry for 10–15 minutes, then apply the second coat. This double coating increases water and stain resistance by 300% without altering breathability or original color.
| Shoe Material | Drying Method | Shape Retention Tool | Color & Surface Protection Solution |
|---|---|---|---|
| Smooth Leather / Patent Leather | Wipe dry with a microfiber towel, air-dry in a light breeze. | Cedar shoe tree. | Apply leather conditioner periodically. |
| Suede / Nubuck | Air dry with cool setting or fan, strictly no heat. | Crumpled absorbent paper stuffed in the toebox. | Brush up the nap with a specialized suede brush + Nano spray. |
| Canvas / Mesh / Flyknit Fabric | Wrap white paper towels around the upper to absorb yellowing, air-dry in shade. | Plastic shoe tree or wax paper. | Apply 2 coats of Nano spray to prevent dirt buildup. |
Investing an extra 5 minutes into drying and protection not only saves costs on buying new or paying for expensive restorations, but also ensures every step is taken with confidence in shoes that hold their shape and look as fresh and vibrant as brand new.
5. Frequently Asked Questions (FAQ)
Improper shoe care is like using body soap to wash your face: it wastes money, damages materials, and rapidly reduces the lifespan of your items. Seemingly harmless cleaning mistakes can turn an expensive pair of shoes into trash after just a few cleans. Below are expert answers to clear up all your doubts and help you master spa-quality shoe care skills right at home.
Should you put multi-material sneakers in the washing machine?
The answer from experts is: ABSOLUTELY NOT. A modern sneaker is typically a combination of leather, mesh, suede, and a rubber sole – bound together by at least 3 types of specialized heat-activated glues. The powerful centrifugal spin cycle combined with continuous soaking in the washing machine will cause a series of severe damages:
- Destruction of glue bonds: Water and friction soften the adhesive, leading to sole separation and fraying edges after just 1–2 washes.
- Deformation and shrinkage: Genuine or synthetic leather soaked for too long loses its natural elasticity, shrinking or cracking as it dries.
- Color bleeding: Dyed leather or dark fabric sections will bleed and soak directly into adjacent light-colored mesh, creating irreversible stains.
The safest solution for multi-material shoes is manual zone cleaning using a soft-bristle brush and a dry-foaming cleaning solution.
| Comparison Criteria | Dry Cleaning | Wet Cleaning |
|---|---|---|
| Frequency | After every 1–2 wears (or weekly) | Every 1–2 months (or when heavily soiled with mud) |
| Tools Used | Dry foam cleaner, horsehair brush, microfiber towel. | Diluted cleaning solution, soft nylon brush, clean water. |
| Main Purpose | Remove surface dust and dirt, preventing deep penetration into fabric fibers. | Deep-clean accumulated sweat inside the insole, eliminating odor-causing bacteria. |
| Safety for Shoes | Maximum (100%) – Does not affect glues or materials. | Moderate – Requires controlled water exposure time. |
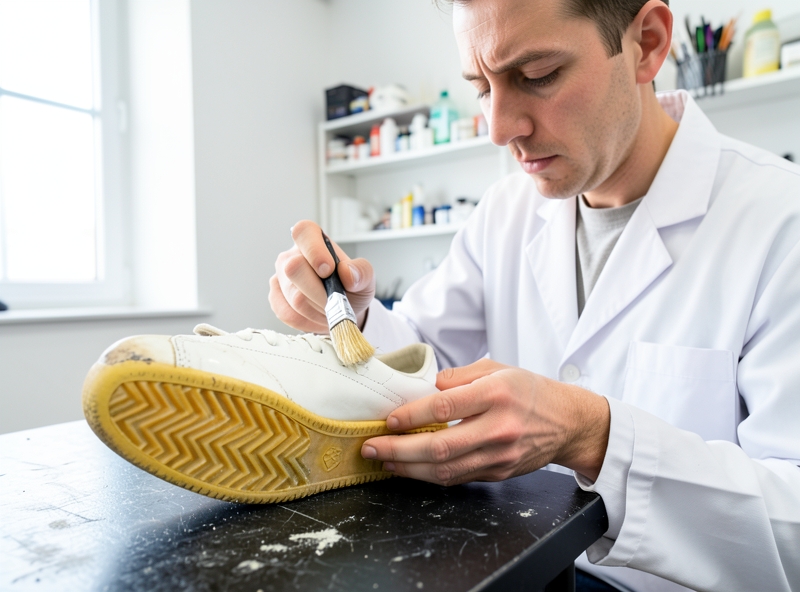
How to effectively fix yellowed rubber soles?
The yellowing of rubber soles is not caused by regular dirt, but by a natural oxidation reaction when rubber is exposed to ultraviolet (UV) rays and air. Therefore, no matter how hard you scrub with soap, it will be completely ineffective and may even scratch the sole surface.
To reverse this oxidation process, you need to apply a chemical un-yellowing method combined with heat/UV light following these standard steps:
- Step 1: Clean the surface: Wash away dirt and grease on the soles using mild soapy water, then dry completely.
- Step 2: Apply specialized un-yellowing cream: Use a solution containing Hydrogen Peroxide (10% - 12% concentration) or specialized un-yellowing creams. Use a brush to apply an even, thick layer onto the yellowed rubber sole. Note: Use painter's tape to cover the fabric/leather upper to prevent accidental discoloration from the cream.
- Step 3: Wrap with plastic wrap: Tightly wrap the treated sole with plastic cling wrap. This traps moisture and keeps the cream from drying out before the chemical reaction occurs.
- Step 4: Expose to UV radiation: Place the shoes in strong direct sunlight for about 1–2 hours (or use a dedicated UV light). UV rays activate the hydrogen peroxide to break down the oxidative bonds causing yellow discoloration.
- Step 5: Wipe clean: Remove the wrap and use a damp cloth to wipe away excess cream. The rubber sole will restore its original brightness by 85% – 95%.
"Don't try to use brutal physical force to solve material issues. In household care, **an understanding of chemicals and patience** are the true keys to keeping items looking brand new."