1. Why Businesses Need to Build an Error-Proof Excel Template
A misplaced comma, an overlooked blank cell, or a mismatched date format can wipe out hundreds of millions of dong for a business in a heartbeat. As team size grows, Excel stops being an individual tool and becomes the data circulatory system of the entire organization. Without control mechanisms right at the data entry stage, businesses leave their financial and operational destiny to random human error.
"Uncontrolled manual data entry is like driving downhill without brakes. You never know at which curve the crash will happen, only that it definitely will."
Most internal data crises do not come from hackers or malware, but stem from careless data entry habits among employees. User A enters dates in DD/MM/YYYY format, User B uses MM/DD/YYYY, while User C abbreviates customer names in their own custom way. As a result, when compiling reports, analysts spend up to 80% of their time just "cleaning up data trash" before they can actually begin extracting insights.
To fundamentally solve this pain point, Data Validation serves as the strictest defensive firewall. This feature allows setting hard rules for each cell: allowing only whole numbers, limiting character counts, requiring selection from a drop-down list, or restricting date ranges. Any input that violates standards will immediately be rejected and flagged with a warning system.

Proactively building an error-proof Excel Template brings three core values that completely transform business operational efficiency:
- Standardize data right from the start: Completely eliminate typos, formatting discrepancies, or missing information thanks to strict binding rules.
- Save hundreds of labor hours: Drastically reduce manual review, filtering, and error-correction time. Employees focus on analyzing numbers instead of cleaning up each other's mistakes.
- Ensure consistency during teamwork: Guarantee that whether 10 or 100 employees work on the same spreadsheet, incoming data remains 100% consistent, ready for automated summary reports using Pivot Tables or Power BI.
| Comparison Criteria | Standard Spreadsheet (Free-form Entry) | Standardized Template (With Data Validation) |
|---|---|---|
| Error Rate | Very high (An average of 5% - 10% of data rows contain formatting or accuracy errors). | Near zero (The system automatically prevents invalid inputs). |
| Report Processing Time | Takes hours or even days to de-duplicate, standardize, and reconcile. | Real-time report updates with just a single Refresh action. |
| User Experience | Confusing and error-prone without specific guidance on each cell. | Smooth operation with predefined drop-down lists and automated instructional prompts. |
It's time for businesses to stop wasting resources on avoidable mistakes. A well-designed Excel Template is not just a work tool, but a digital asset that optimizes the entire internal operational process.
2. Techniques for Creating Smart Input Fields with Data Validation
An extra character in a tax ID, a misplaced hyphen in a phone number, or an inverted date format can instantly distort a company's entire automated reporting system. In fact, 80% of data processing time is wasted just cleaning up manual data entry errors. Instead of dealing with the aftermath, setting up "Smart Input" techniques using Data Validation transforms spreadsheet cells into intelligent filters, proactively preventing mistakes from the very first keystroke.
"Clean data right from the source is a prerequisite for running automated processes effectively."
Secrets to Creating Dynamic Drop-down Lists Using Named Ranges
Manually entering a source list directly into the Data Validation configuration box is a common mistake. When the personnel list, product catalog, or branch locations change, you have to manually edit every single cell. The optimal solution is to use Dynamic Named Ranges combined with Excel Table formatting.
- Step 1: Highlight the source data list and press
Ctrl + Tto convert it into a Table. Name the tableDanhSach_Nguonin the Table Name section. - Step 2: Go to the
Formulastab, selectName Manager, then clickNew. Name the rangeDoiTac_Dongand enter the formula in the Refers to box:=INDIRECT("DanhSach_Nguon[Tên Đối Tác]"). - Step 3: Select the cell where you want to create the drop-down list, go to
Data, and selectData Validation. In the Allow field, selectList. In the Source field, enter the formula=DoiTac_Dong.
Thanks to this mechanism, whenever you add or remove partners in the source table, the selection list in the input cells will automatically update instantly without requiring reconfiguration.

Absolute Control Over Date, Integer, and Decimal Formats
To prevent entering a delivery date earlier than an order date, or entering a negative product quantity, you need to enforce strict mathematical constraints:
- Date Validation: Select
Datein the Allow field. Set the condition togreater than or equal toand enter the formula=TODAY()in the Start Date field. This rule ensures employees cannot enter past dates for future plans. - Numeric Validation (Integers and Decimals): For product quantities, select
Whole numberwith the conditiongreater than 0to eliminate negative or zero entry errors. For unit prices or discount rates, selectDecimalto allow accurate decimal values.
Character Length Restrictions: The Key to Standardizing Tax IDs and Phone Numbers
Tax IDs (10 or 13 digits) and phone numbers (10 digits) are frequently entered incorrectly due to extra or missing spaces, periods, or hyphens. To force users to enter the correct standard length, apply the Text Length feature combined with custom formulas (Custom Validation):
In the Phone Number input cell, select Data Validation, and in the Allow field, select Custom. Enter the formula: =AND(ISNUMBER(A1*1), LEN(A1)=10) (where A1 is the cell being configured). This formula checks two conditions simultaneously: the input data must be a numeric string, and the character length must equal exactly 10 characters.
| Data Field | Data Validation Type | Standard Configuration / Formula | Operational Benefits |
|---|---|---|---|
| Tax ID | Custom | =LEN(TRIM(A1))=10 |
Prevents hidden space errors and enforces entering exactly 10 characters. |
| Phone Number | Custom | =AND(ISNUMBER(A1*1), LEN(A1)=10) |
Ensures uniform contact format without alphabetical characters. |
| Delivery Date | Date | >= TODAY() |
Eliminates chronological logic errors in the supply chain. |
| Inventory Quantity | Whole number | >= 0 |
Eliminates negative entry errors that distort financial reports. |
Applying this Smart Input rule set not only optimizes employee workflow speed but also builds a solid data filter ready to connect directly with smart reporting tools without wasting a second on error handling.
3. Optimize User Experience with Input Messages and Custom Error Alerts
Have you ever been driven crazy after receiving a ruined report file because staff entered the wrong format, mistyped a product code, or filled in dates incorrectly? Cleaning up and manually fixing errors consumes up to 80% of a business's data processing time. Instead of playing "police" chasing down employee mistakes, proactively establish an automated prevention and guidance system right from the very first data entry step.
Using a combination of Input Messages (Proactive Guidance) and Custom Error Alerts (Customizable Error Warnings) is the ultimate solution to turn dry, complex spreadsheets into user-friendly and professional tools, just like a real software application.
Proactively Guide Users with Input Messages
Imagine an Input Message as a virtual assistant standing by at a data cell. The moment a user clicks on the configured cell, a pale yellow tooltip box pops up instantly to provide detailed guidance on how to enter data.
- Eliminate ambiguity: Instead of making users guess whether "Employee ID" should be uppercase or lowercase, an Input Message will explicitly state: "Enter in the correct format EMP_XXXX (e.g., EMP_2024)".
- Save training time: New employees can confidently work on complex report files without needing direct supervision, minimizing repetitive questions.
- How to set up: Select the data range > Go to the Data tab > Select Data Validation > Switch to the Input Message tab > Check "Show input message when cell is selected" > Enter a title and concise guidance text.
Strict Discipline and Flexibility with Custom Error Alerts
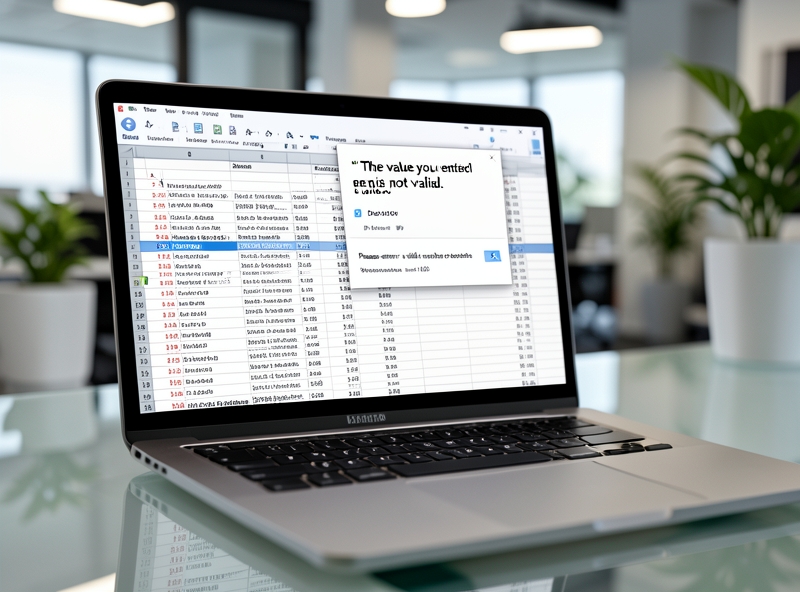
If an Input Message is a "road sign," an Error Alert is a "protective barrier." When users intentionally or accidentally enter data that violates preset rules, the system immediately blocks it and displays a warning message. The key to creating a professional setup is knowing how to apply 3 error control levels tailored to each operational scenario:
| Error Level (Style) | How It Works | Best Use Cases |
|---|---|---|
| Stop (Absolute Prevention) | Displays a red X icon. Locks the data cell and requires correction to proceed, with no exceptions. Does not allow saving invalid values. | For core, critical data where errors cannot be tolerated: Tax ID, Social Security / National ID numbers, Product Unit Price, or Date Formats. |
| Warning (Flexible Alert) | Displays a yellow exclamation mark icon. Warns of unusual data but allows users to override (Yes/No) if they have a valid reason. | Applied to financial limits or inventory thresholds. For example: Warning that expenses exceed the monthly budget, but still allowing entry if special approval is given. |
| Information (Pure Notification) | Displays a blue "i" icon. Serves only as a gentle reminder and does not prevent user data entry. | Used to remind users of supplementary information. For example: Reminding them to check a customer's email to see if they have registered for a membership card. |
"A smart spreadsheet is not just a calculation tool; it is a closed-loop, self-correcting process where users are guided to get things right from the start."
By customizing error messages (writing detailed warning text instead of leaving the system's default English alerts), you help employees understand exactly where they made a mistake and how to fix it. Investing 5 minutes in setting up Input Messages and Custom Error Alerts will save your business hours of data crisis handling down the road.
4. Protect worksheet structure (Protect Sheet) for safe team collaboration
Imagine spending an entire day setting up a complex nested formula system, only for a colleague's accidental keystroke during data entry to instantly trigger a wave of #REF! errors across the entire spreadsheet. Sharing a collaborative file always comes with the risk of breaking the data structure if you don't know how to limit user permissions. To protect your hard work while ensuring smooth team collaboration, the ultimate solution is smart permission locking: allowing data entry only in designated areas and completely freezing formula cells.
By default, Microsoft Excel sets the Locked state for all cells on a worksheet. However, this feature is only activated when you turn on Protect Sheet mode. To set up a professional permission system, you need to reverse this process by following these exact steps:

Step 1: Unlock the entire worksheet (Unlock cells)
First, you need to allow users to enter data everywhere before specifying the areas to be locked. Press Ctrl + A to select the entire worksheet. Right-click, select Format Cells (or press Ctrl + 1). In the window that appears, switch to the Protection tab, uncheck the Locked box, and click OK.
Step 2: Quickly locate and lock formula cells specifically
Instead of manually searching row by row, let Excel scan automatically. Press F5 (or Ctrl + G) to open the Go To dialog box, then select Special.... Here, check the Formulas option and click OK. Immediately, all cells containing formulas on the worksheet will be automatically highlighted. Next, press Ctrl + 1, go back to the Protection tab, and this time check the Locked box to lock these formula cells specifically.
Step 3: Activate Protect Sheet mode and set a password
Go to the Review tab on the ribbon and select Protect Sheet. An options box will appear asking you to set detailed permissions for users:
- Password to unprotect sheet: Enter a highly secure password (avoid easily guessable sequences like 123456).
- Allow all users of this worksheet to: Uncheck the Select locked cells option and keep only Select unlocked cells checked. This configuration prevents other users from even clicking on your formula cells, completely eliminating the possibility of accidental interference.
| Comparison Criteria | Unprotected Worksheet | Permission-Protected (Protect Sheet) |
|---|---|---|
| Formula Integrity | Easily overwritten, accidentally deleted, or incorrectly modified. | Completely secure; formulas are hidden or tamper-proof. |
| Team Data Entry Experience | Chaotic; users don't know which cells they are allowed to edit. | Smooth; the mouse cursor automatically skips locked cells. |
| Data Recovery Time | Takes hours to troubleshoot errors when issues occur in the file. | Nearly zero; the worksheet structure is always preserved. |
"Data security is not about preventing collaboration, but about creating a safe corridor for all team members to work freely without fear of breaking each other's system."
By applying this systematic formula-locking process, you not only protect your hard work but also enhance professionalism when sharing collaborative resources. The worksheet now functions like a real software application: an intuitive data entry interface, secure, and performance-optimized for the entire team.
5. Conclusion and Template Testing Process Before Handover
No matter how complex an Excel template is designed, it will become a "ruin" if it breaks the very first time a user enters data. The moment you hand over the file to other departments is when error scenarios begin to emerge: staff copy-pasting over formulas, entering the wrong date format, or accidentally deleting rows containing core logical functions. To ensure data integrity and the designer's credibility, establishing a destructive testing process (Destructive Testing) before handover is mandatory.
To achieve absolute perfection, your template must pass the rigorous testing filter below. This is not just about checking whether formulas run correctly, but a deliberate effort to "intentionally break" the system to uncover potential data security vulnerabilities.
| Test Scenario | Intentional Destructive Action | Standard Required Outcome |
|---|---|---|
| Input Format Testing | Entering text characters into cells requiring Number/Date format; entering negative numbers into quantity cells. | The Data Validation dialog immediately blocks the entry and displays instructions for correct input. |
| Formula Sensitivity Testing | Dragging and dropping data cells; copy-pasting raw data over formatted areas. | Formula ranges are locked (Lock Cells/Protect Sheet), completely preventing unintended overwriting or editing. |
| Structural Integrity Testing | Intentionally right-clicking to insert rows, delete columns, or rename linked sheets. | The workbook structure is password-protected (Protect Workbook); functional options are disabled to preserve the original architecture. |
| Empty Data Testing | Leaving required fields blank and proceeding to export reports or run macros. | The conditional formatting system highlights blank cells in red; macros automatically stop and display an error notifying missing information. |
After passing the above destructive testing steps, apply the final 3-step optimization process before sending the file out:
- File Cleanup: Remove all junk data and extra blank rows at the bottom of the page to minimize file size. Press
Ctrl + Endto ensure Excel does not mistake blank areas for active data ranges. - Reset Cursor to Starting Position: Save the file with all sheets scrolled to the top-left corner (cell
A1). This small action creates an extremely professional and clean user experience as soon as the file is opened. - Provide a Quick Guide: Integrate a sheet named "Guide" at the beginning of the workbook, briefly summarizing input-allowed areas in blue and automated calculation areas in gray so users do not feel confused.
"A perfect template is not a file containing the most complex formulas, but a system so intuitive that even a new employee cannot make it function incorrectly."
By strictly adhering to this testing process, you not only save hours of troubleshooting later on, but also transform every custom-designed Excel tool into a true office technology product: secure, accurate, and unbreakable.